
Tales of Sea Hawk Storyline
Part 1: Tutorial deck
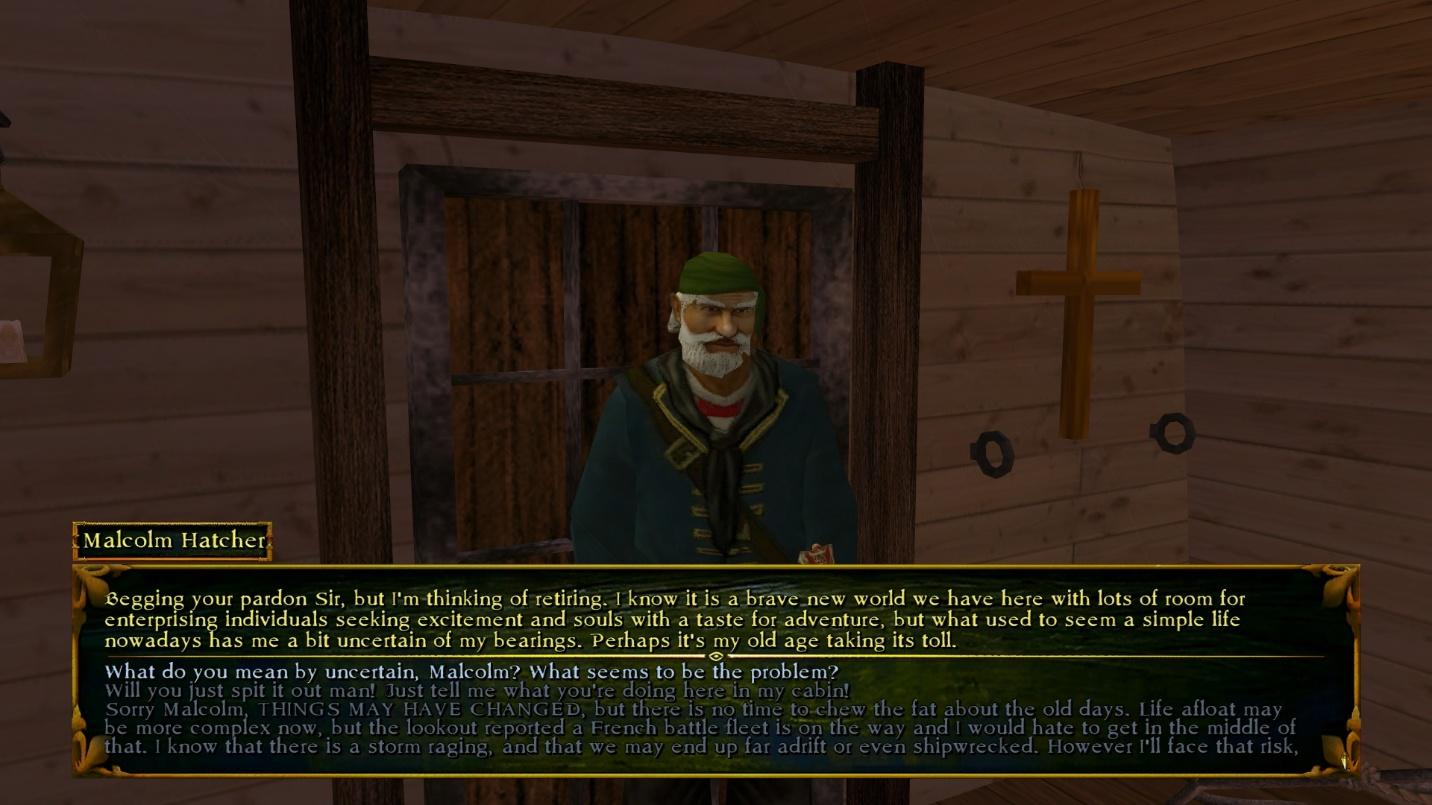
The story begins in your ship’s captain cabin as you dock in Speightstown, Barbados, where Malcolm Hatcher comes to speak with you.
If, at the very start (during storyline selection menu), you choose to change your national flag from the default option, you will instead begin in a different town based on the nation you picked. Regardless of which town you start in, Malcolm will guide you through the tutorial, introducing key locations such as the Stall Trader, Store, Tavern, and Shipyard. The main storyline, however, will only commence once you set sail and reach Barbados (in case you start in a different port).
Skip option 1
If you want to skip the tutorial part, select option 1: What do you mean by uncertain, Malcolm? What seems to be the problem? After that, follow the dialog until you get to the part where you can choose more options. The option that “releases” you from the tutorial part is the second one:
I remember everything just fine. Thanks.
After selecting that option, a few more dialog nodes will pop up, but you have no other options to select, so just follow what your hero speaks to Malcolm (he will give you some tips), and you are good to go.
Malcolm leaves the cabin, and you have all your itemst equipped by default. From this moment you are free to roam.
Skip option 2
Another way to skip the tutorial deck is to choose the third option when Malcolm speaks to you: Sorry Malcolm, THINGS MAY HAVE CHANGED…
Selecting this option skips any other dialogs with Malcolm and triggers a “stormy start”. Supposedly, you choose to leave the port immediately in the middle of a storm, without waiting for it to finish. You get into a shipwreck and are cast away on a random shore. You can get to your ship and continue the voyage (mostly by going through the jungles to the town, where your ship will be moored), but in most cases you won’t be in Barbados, where the storyline starts. So you will have to sail there.
Ship deck
Once you get to the main deck, go straight to the bow of the ship, and on the right side you will see an icon displaying town.
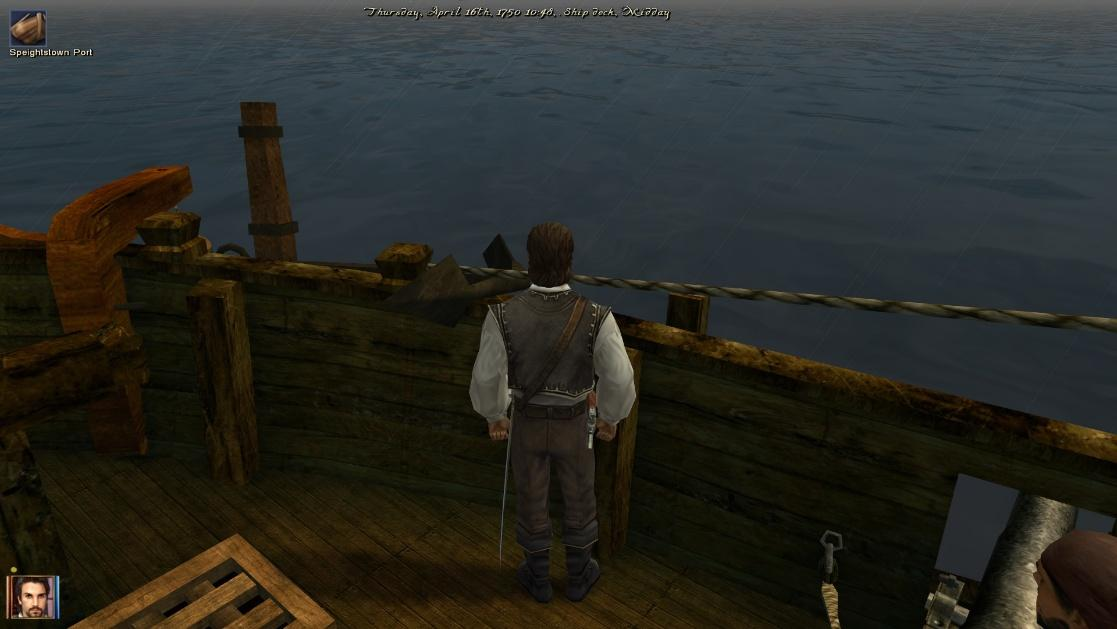
Press the SPACE button and you will be taken to the town. Alternatively, you can press ENTER key and choose the town icon.
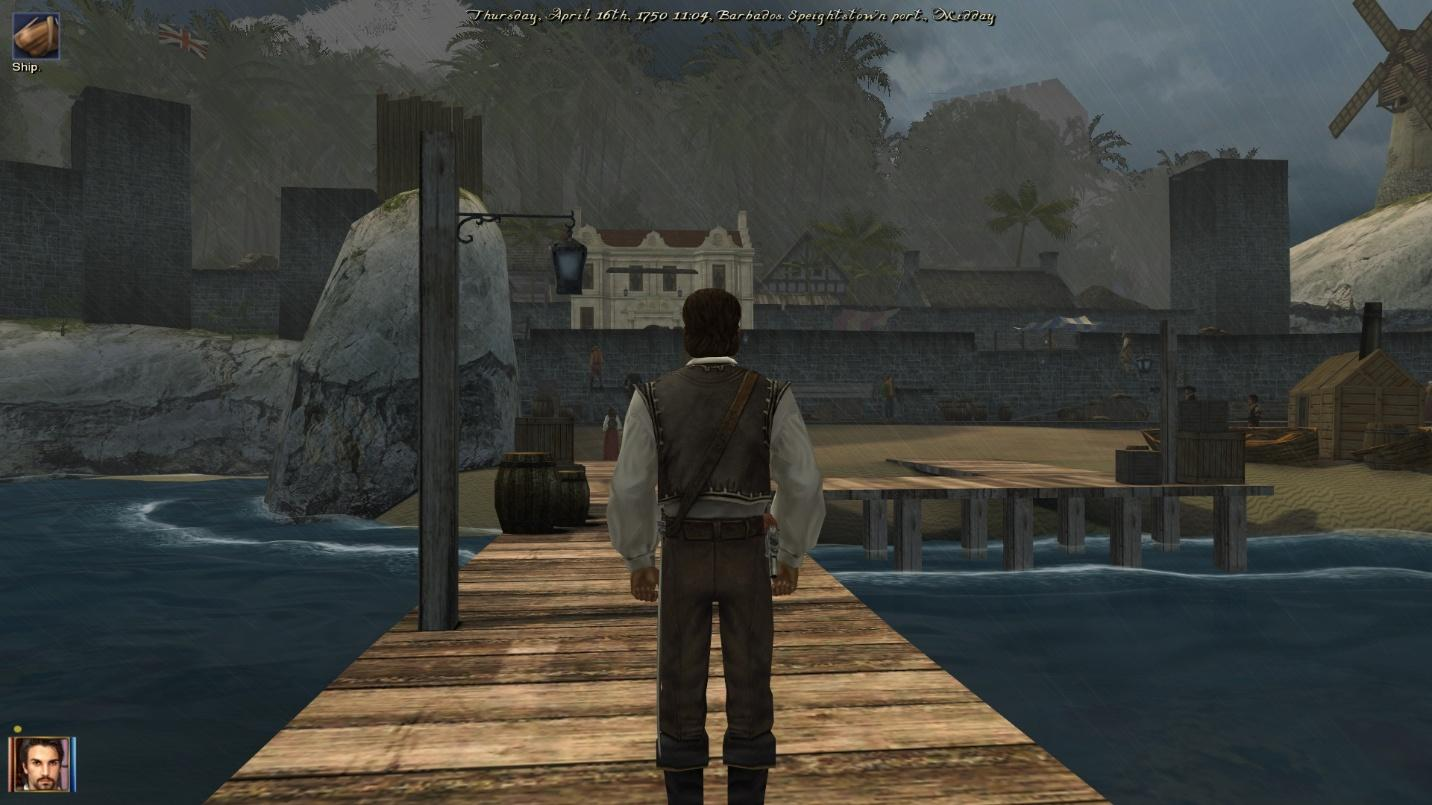
You start at Speightstown dock. From this moment you can freely roam the city, investigate the town or go deeper into jungles.
Understanding the basics of the game
New Horizons is a mod with no safe places: you can be attacked anywhere – in jungle, in town or port. There are situations when street bandits will sheathe their sword and try to kill you. You will recognize dangerous situations by the red blinking square on your hero’s portrait picture.
Note: if you are playing Maelstrom version, you can press and hold CTRL button to rotate the camera around your hero.
In most ports or towns, there are street vendors who sell different items. Make sure to check what they sell occasionally. You can find some good quality items from time to time.

Part 2: Sailing to Port Royale
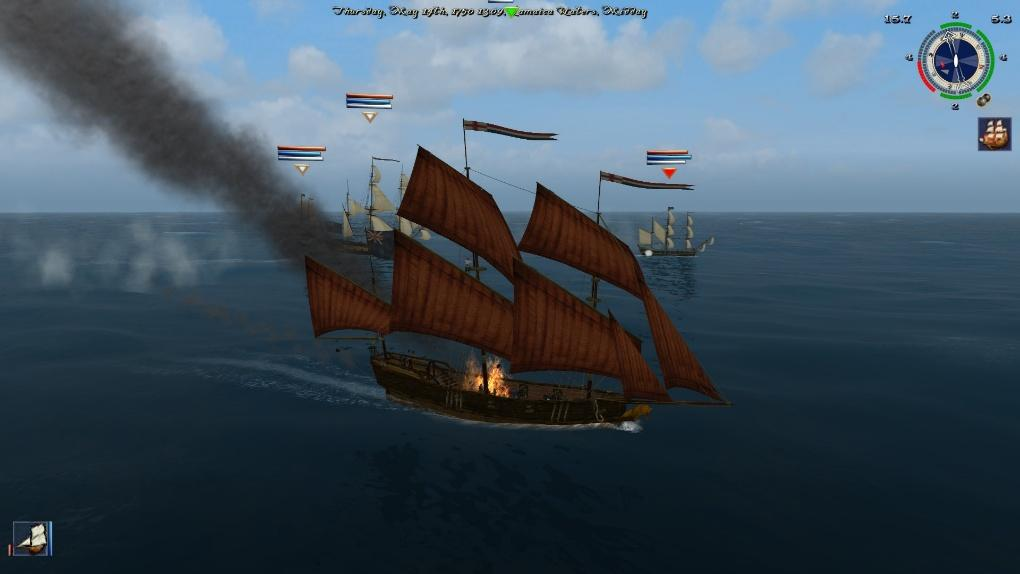
Once you have examined the city, you can continue with the storyline. Go back to port and enter the ship. Alternatively, you can go directly to sea by pressing ENTER and choosing the Sea icon. Once you are at sea, you will see 3 French ships moored near the island. Those ships are a military squadron sent to invade Speightstown.
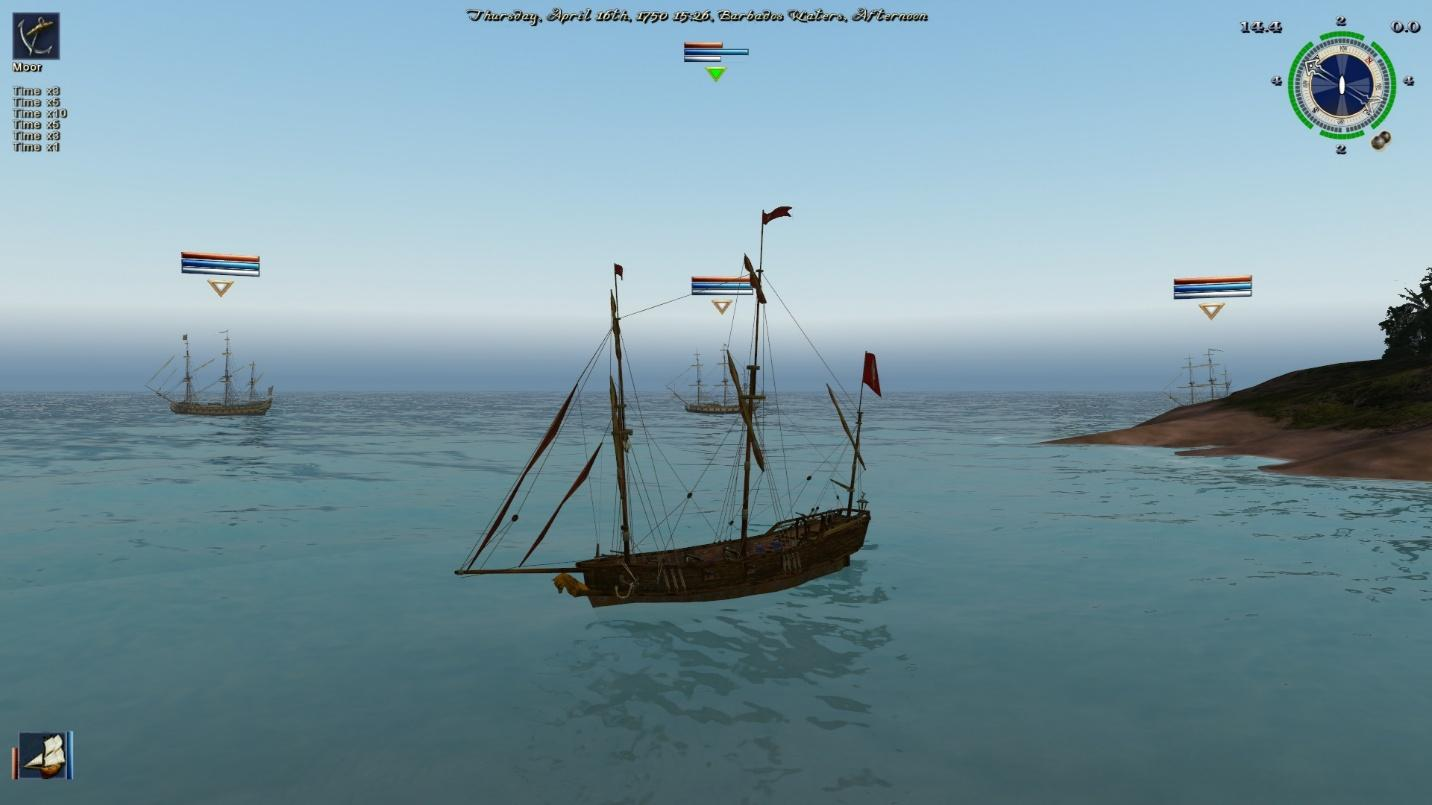
From sea mode, you can go to world map. Once you go to world map, hit the TAB key to have a zoomed out preview of the map, and find the island of Jamaica. You need to sail to Port Royale. Once you move away from Barbados, a video will play automatically showing the invasion of the French. The small ship that managed to get away is yours. From this moment, the storyline begins.
Part 3: Arriving at Port Royale
Once you arrive to Port Royale, go and visit the governor. The Townhall is located straight from the gate, just after the small bridge. You will see a large fancy building with guards in front. First two guards will stop you and ask you where you are going. It’s a basic dialog, so you just choose the only option: Calm down, soldier. I’ve got to talk to our governor.
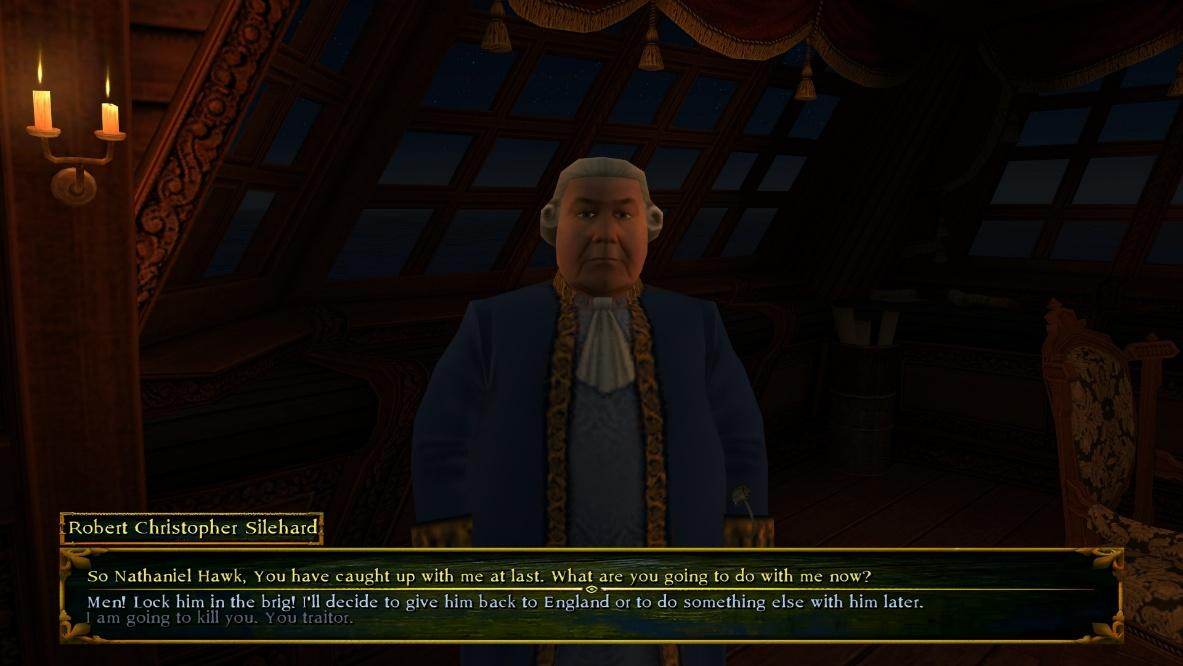
Once you enter the Townhall, your hero will walk by a guy called Raoul Rheims. An automatic dialog will trigger and he will leave the residence. After that talk to the governor Robert Cristopher Silehard. Choose the first option – to inform him about the attack on Speightstown. Proceed with the dialog until you get to the part where he tells you that this situation will affect your ship as well. From that point, whatever option you choose, will lead to the same result: questbook will update and you will receive a task to go back to Barbados and infiltrate into Speightstown from the shore.
Part 4: Sail to Barbados
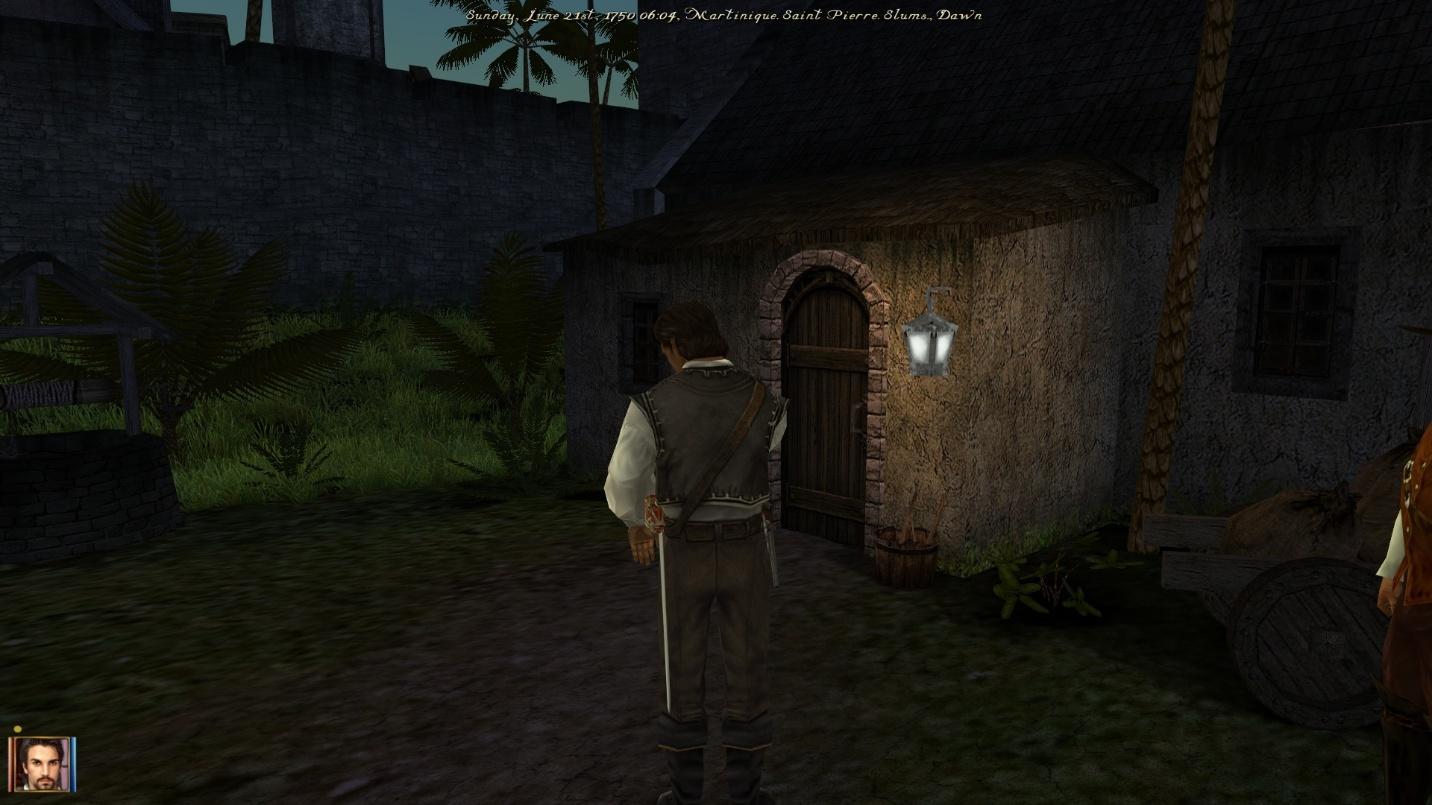
As the governor told you, sail to Barbados, but try landing as further as possible from the Speightstown, cause if you land near, fort will start shooting at you. Sail to Far Beach (might differ in Maelstrom version from Beyond New Horizons because of the different shape of the islands, everything else is the same). Once you find it, aprroache the shor (Moor icon will appear in the upper left corner), press ENTER and select Shore icon. You will go directly to the beach.
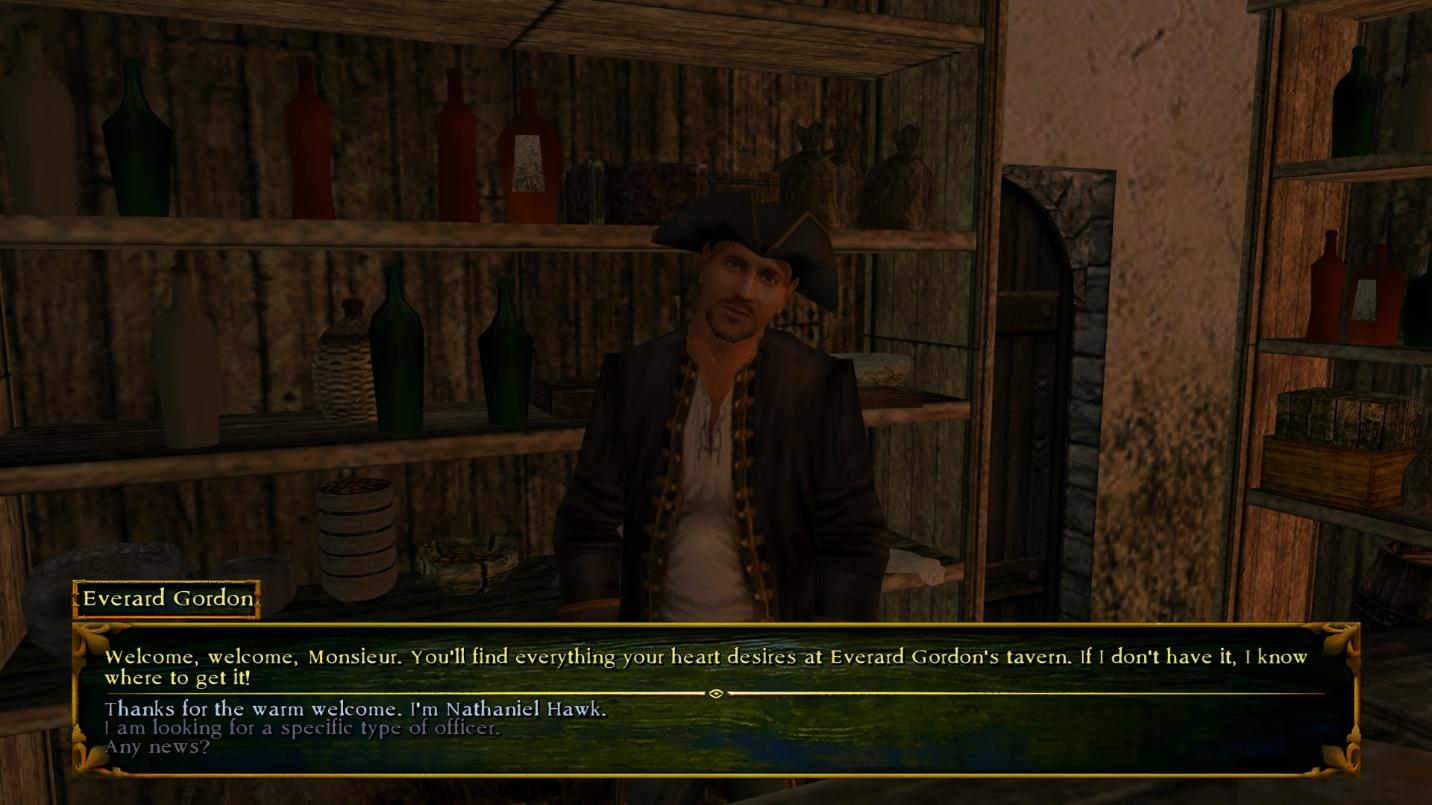
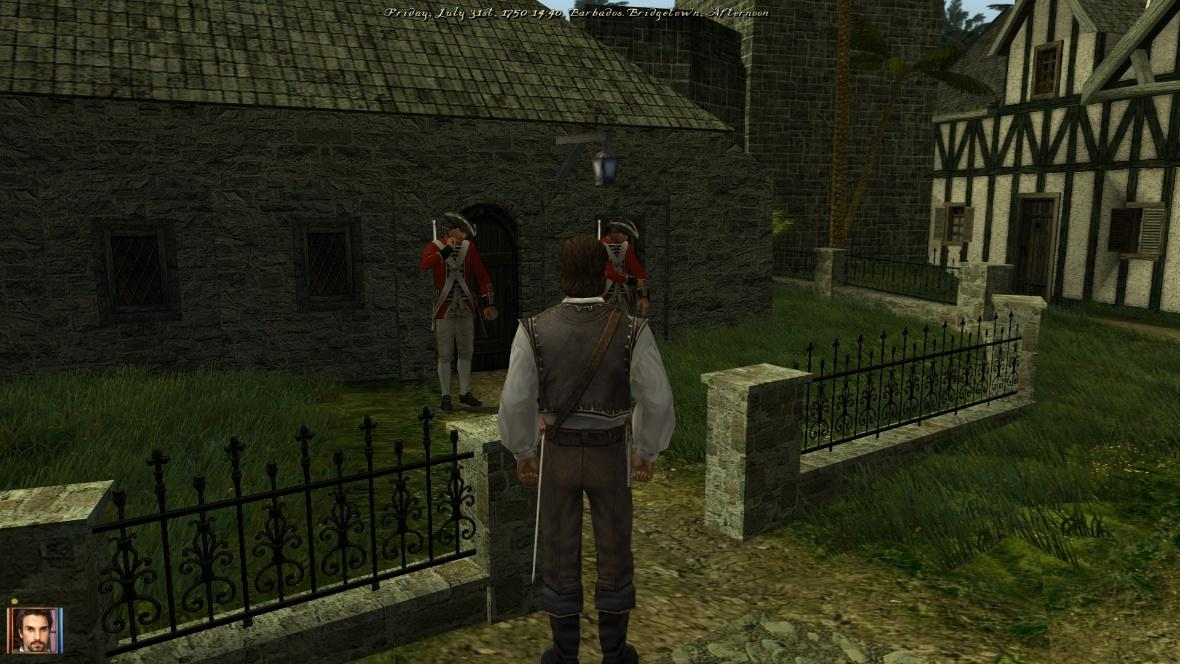
Go straight, a loading screen will take you to the next scene. Go straight again and you will see the walls of Speightstown from the distance. Two guards are standing in front of the gate. Approach the gate and they will start running towards you. A dialog will pop up, and they will ask you to tell what business you have in the town. Whatever you select will eventually lead to a fight (they know you are a spy). Kill them both. Enter the town. Go over the stairs and straight through the gate guarded by two French soldiers. You will enter Speightstown. Go to the tavern. Talk to the bartender Everard Gordon.
Choose the first option. Then choose the second option. You will start speaking with him about the French occupation. It’s a long dialog, so proceed until the very end, cause you don’t have other options to choose. He tells you to speak to the French soldier sitting at one of the tables, and try making him drink more until he starts talking. He goes by the name Valentin Massoni. Proceed with the dialog, since you don’t have other options to choose from. New scene will load, and you will be near the city gates in the middle of the night. One of the French officers speaks to you asking where you and the soldier are going. Soldier will say that you are going to visit some ladies. Pass through the gate and you will find yourself in the outskirts of Speightstown. The French soldiers that hired you to be his navigator on the ship starts walking away from the gate. Follow him. After realizing that you deceived him, he tells you that a barque called ‘Oiseau’ will be coming to the island soon to bring fresh arms and munition. You have two options: to kill him or to let him go. Both choices will alarm the soldiers that guard the gate to attack you.
After you have killed the guards (you can also choose to run away by going through the jungle), go back to the ship. Sail back to Jamaica. Go to the governor Silehard. Choose the first option: I have a business to discuss. Proceed with the dialog about the invasion. He will give you a new quest: to sink the barque ‘Oiseau’.
Part 5: Sinking the barque ‘Oiseau’
Sail to Martinique. Land a little bit further from the island. Press F2 and open RELATIONS menu. Under the Hoist flag section, you will see different nation flags. The one on the far right will be selected (unless you changed it previously during gameplay). That is PERSONAL flag. At this point, you need hoist the French flag, otherwise the fort will attack you when you approach.

You can see if a fort is hostile to you by pressing ENTER. If you can only sail to the fort, that means you are sailing under an enemy flag. Once you hoist a friendly or neutral flag, the icons will change and you will be able to sail to the port. Most ships around the island will also become friendly.

Go to port. A cutscene will start and a guy with a hat named Faust Gasquet will approach you on jetty. Make sure you select option 1, otherwise the dialog will end and he will walk away. That doesn’t break the storyline, but ends the easy way to do this quest. Ask him all the questions you can, and eventually he will ask for a small fee for the info and for the church donation. He will also tell you the name of the captain of ‘Oiseau’. Captain goes by the name of Amiel Berangere. After this, go to tavern. Talk to bartender. Ask him for latest news. He will ask for money. Agree to pay him. Choose the option: I’d like to talk business with you. Very important business. He will tell you that Amiel Berangere rented a room from him and that he is upstairs. Go to the room. When speaking to him, he tells you the reasons why he accepted to escort the French. You have two options: first one to kill him, second to pay him let you do the escort. Choose what you prefer. You will get the escort identification letter. If you kill him, the bartender will come upstairs and see the dead body. He will ask for 1800 gold coins to keep his mouth shut and to clean the mess. You can either pay the money or threaten to kill him as well (choose what suits your style). After that, leave the tavern.
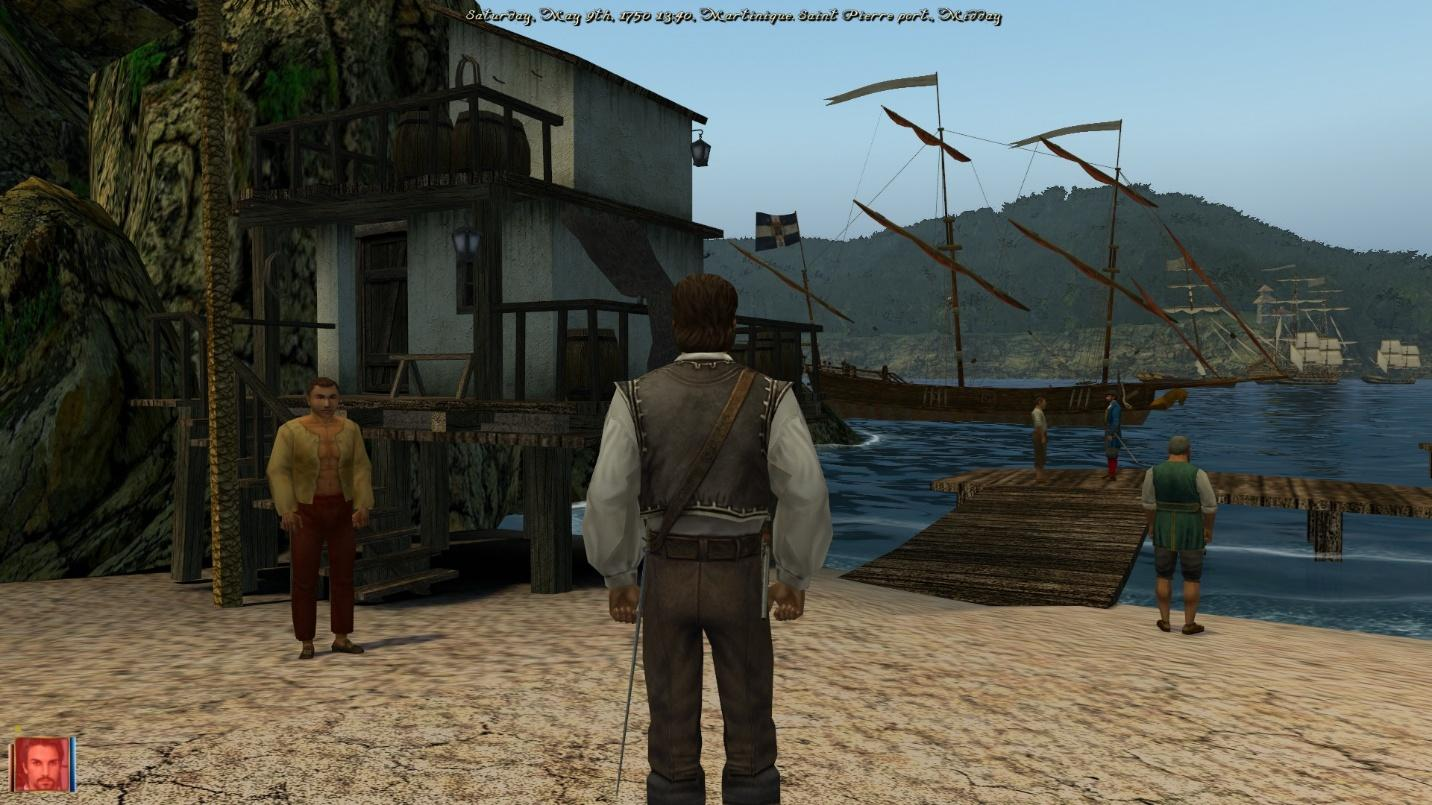
Go to the harbor master (building on the picture near jetty).
Talk to Turpin Cabanel. Tell him that you are the captain that was hired to escort the ‘Oiseau’. He will check you identification letter. Now go outside and speak to Virgile Boon (he will approach you). He tells you that he is ready to set sail. Make sure you have full crew before leaving, cause you will have to fight this ship. Go to the sea, a European barque will be in your escort. Sail to Jamaica. Land near the island (not to close because you are still under French flag). Virgile Boon’s ship will leave your escort and start sailing in random direction. Hoist the English flag, which will make other nearby ships to become friendly to you, and the fort as well. (Note: it’s not so easy to sink it because this barque has more guns and HP than your ship. It’s best to lure it closer to the nearby English ships and use their help to sink it).
Once you have sunk the ‘Oiseau’, Quest book will update. Go to the governor of Port Royale and talk to him. You will inform him about the sinking of the barque. He will immediately give you another task – to escort Ewan Glover to Barbados and to meet with English spy there.
Part 6: Escorting Ewan Glover
Go to port. Ewan Glover approaches and speaks to you. After this dialog, you can set sail to Barbados. Go to Bridgetown. A cutscene will play at jetty. Ewan Glover approaches you, and after him another guy named Wilfred who tells you about the plan of hiding the soldiers inside a cave. He tells you to meet at the Gray Rock Bay bay. After that Ewan Glover offers you to wait for nightfall in a local tavern. Accept that. During conversation in the tavern, he tells you about Silehard’s controversial decision to send off the only remaining naval ship that was guarding Barbados prior to French invasion. This is the first time you start learning about Silehard’s wicked side.
After tavern conversation, you will be automatically teleported to jetty. Sail to Gray Rock Bay and land there. Wilfred approaches you on the beach. He tells you that French must’ve noticed his torch and that a French patrol is on their way to the beach. A fight scene happens. Defeat the French and then Wilfred tells you more about his plans to invade Speightstown. After that dialog, you are teleported to the tavern. Ewan Glover approaches and tells you that his work is finished and that he will sail to Port Royal.
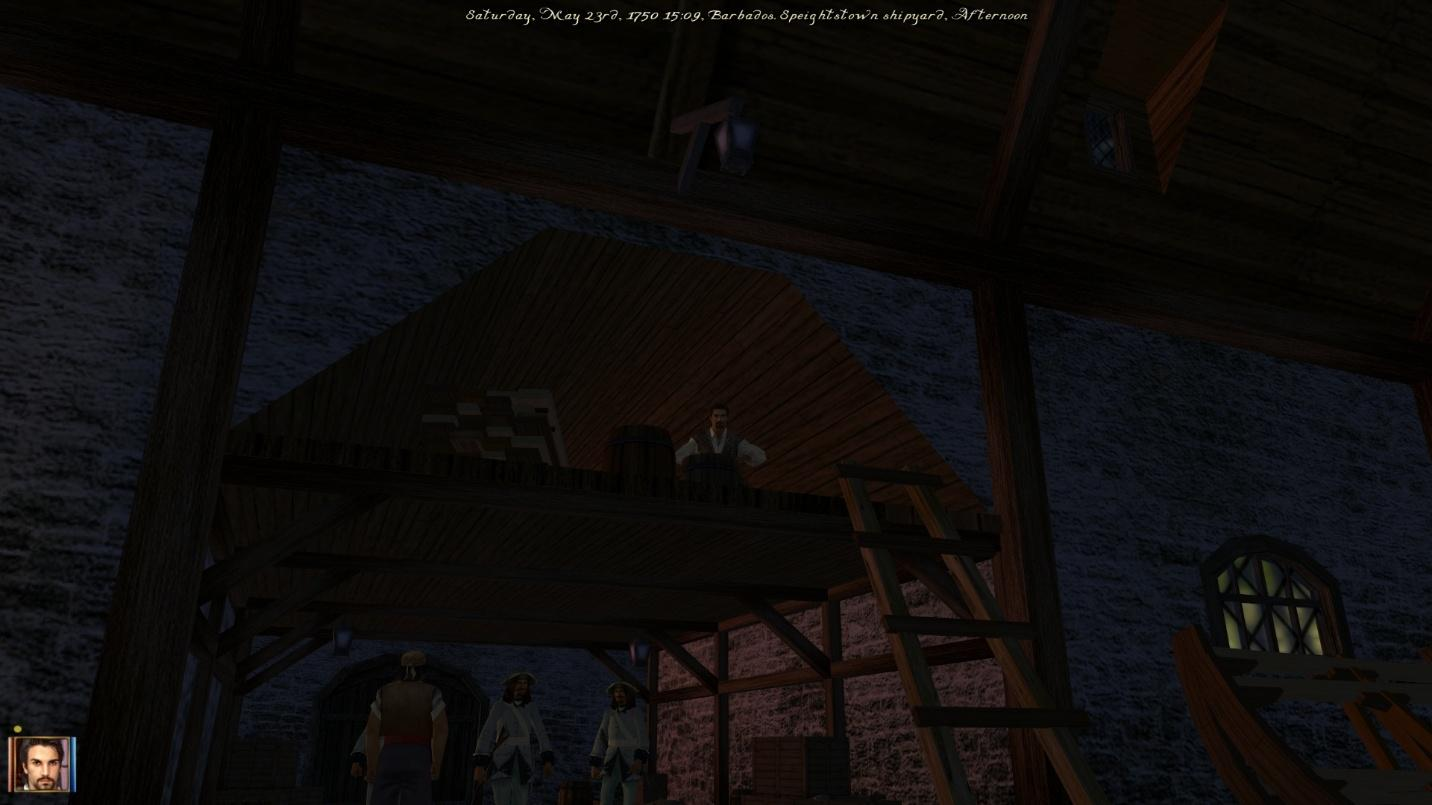
After that, go to Speightstown through the jungle. Go to tavern and speak to bartender. Tell him that you have some business to discuss. An option saying: Have you seen a man around here by the name of Tobias will become available. He tells you that he’s waiting upstairs, disquised in French uniform. Go upstairs and talk to him. After the conversation, 4 French soldiers will climb upstairs and tell that you are both arrested as enemies and spies. Fight the soldiers (Tobias will help you) and kill them. After that, you are transferred in a small cutscene to the bartender downstairs. Tobias tells you that he has a friend in the local shipyard who can hide you both. Run out of tavern and follow Tobias to the shipyard. French soldiers will try to attack you. In the shipyard, Oweyn McDorey approaches you. He quickly hides both of you in a safe place. French soldiers enter and leave.
After they go, a cutscene happens. Oweyn McDorey speaks first. He asks you for a little favor. Since you are going to Port Royal, he gives you a closed chest to deliver to the tavern owner in Port Royale. After what he has done for you and Tobias, you accept this favor (you can’t refuse this). After that, Tobias tells you that now that his cover has been blown, you will need to alert the French captain Rabel Yverneau that the plan has changed. He needs to meet Tobias behind the tavern.
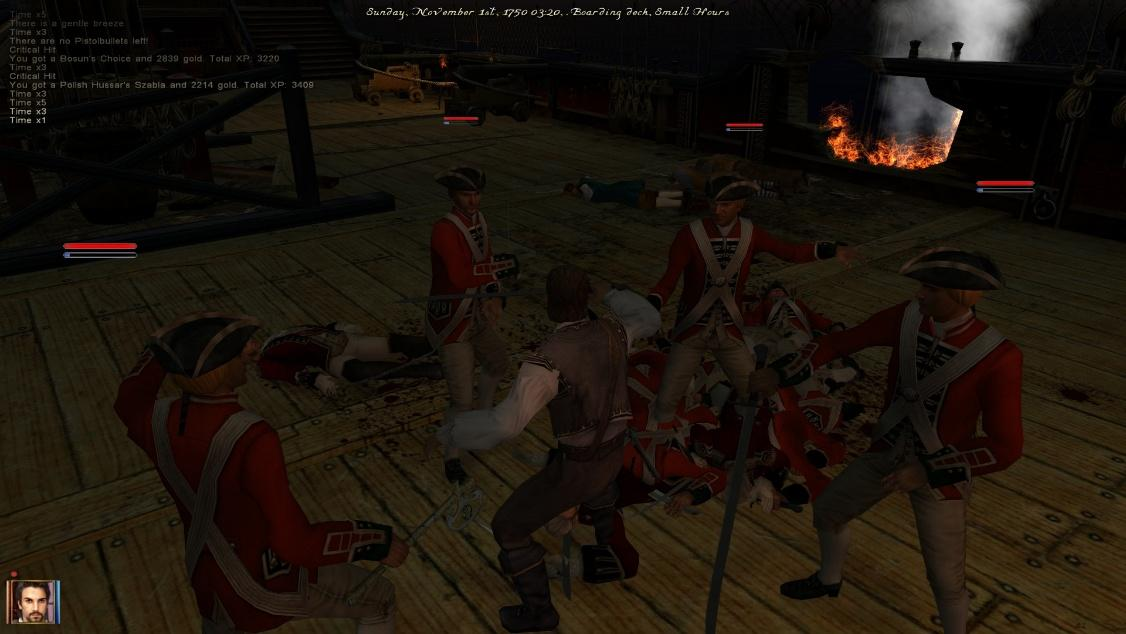
Go back to tavern and speak to Rabel. He is wearing a French uniform. He seems suspicious, but you persuade him that Tobias ran unto trouble. You are teleported in front of tavern. Go behind tavern (Rabel will follow you). Tobias will be waiting there. Speak to him. After the conversation, both Rabel and Tobias will run to the gate that leads to port. Follow them. Once the scene loads you to port, Florian Vollonville will speak to you. Tell him that you are Mr Rabel’s friends. He will let you pass (second option will trigger an immediate fight). Once you get to jetty, a large group of soldiers will start chasing you. Get to the ship as fast as possible. You will be sailing a third class flushdeck frigate. Fort will start shooting at you and all the surroding French ships will start chasing you. Don’t try to fight, run with the wind.
Part 7: Sailing back to Port Royal
Sail back to Port Royal. When you reach Jamaica, a cutscene will take you directly to the governor. He will reward you for the mission and inform you about the planned siege of Speightstown.
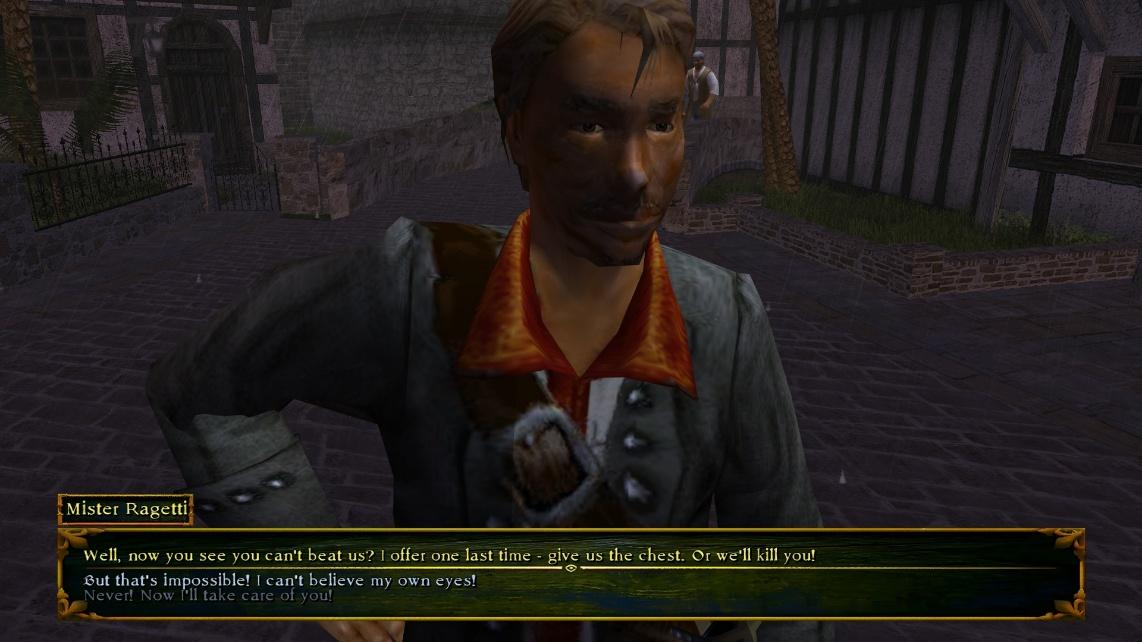
Walk to tavern. Two pirates will wait for you outside. Once you approach the tavern, a cutscene plays and they approach you. One of them (Ragetti) asks that you hand over the chest. You can either choose to give it instantly, or refuse and fight. Whatever you choose, you will end up losing the chest (they are invincible, cause they come from the cursed ship). If you choose to fight them, a dialog will play once you realize that you can’t beat them.
Go with the first option and hand over the chest (the whole thing was a setup). Quest book updates. Now go to tavern. A blonde woman named Danielle Greene will be standing in front of the bar. Talk to her. Your conversation will be interrupted by English soldiers who enter the tavern. They tell you that you are under arrest. Fight the soldiers. Danielle’s bodyguard Ralph gets killed. She says to you that someone will have to pay for his death. Danielle runs out of tavern. More guards arrive and you can’t fight anymore. You are thrown in prison.
Part 8: Escaping from prison
You are in a prison cell. After a few moments inside, Edgar Attwood, the prison keeper comes and speaks to you. He tells you that you will spend the rest of your days in prison. There is more dialog, just continue reading until it finishes (you don’t have other options to choose). If you have leadership 5 or above, you may hire him as your gunner. Otherwise, he will refuse. After one day of waiting inside, governor Silehard comes to visit you personally asking to forgive him, cause everything has been a terrible mistake. Soldiers mistook you as a spy. Dialog ends and you are teleported into governor’s office. He tells you good news – Speightstown is free. He gives you another mission – to find and bring the traitor Raoul Rheims.
Part 9: Finding the traitor Raoul Rheims
Sail to Pirate Settlement on Nevis (Note: If you have play BNH, zoom in on the map to find it). If this is your first visit to the Pirate Settlement on Nevis – Artois Voysey and Nigel Blythe quests (sidequests) will be triggered upon entering the settlement. When you arrive at the Pirate Settlement, a cutscene will play where one guy is beating a helpless man Artois Voysey. Your hero automatically speaks to the man, and there you have two options: to either let him kill Artois, or to fight him and defend his life. If you fight him, Artois Voyseq side quest will be triggered. He joins you as your officer.
Now you can continue with the Raoul Rheims quest. Go to tavern – talk to tavernkeeper – if you have the correct Reputation and Leadership Skill Level tavernkeeper will tell you what you need to know, otherwise – exit the tavern and a pirate will talk to you – pay him (1500 gold), intimidate him or kill him – if you kill him search the other islands (Martinique, Puerto Rico, Bonaire, Grenada) talk to tavernkeepeers, they will tell you when they last saw Rheims.
My personal suggestion is to pay the Pirate 1500 gold coins (to skip all the discrepancy). Once you obtain the info about Rheims’ whereabouts, sail to La Grenade, to Sao Jorge. At jetty, your hero will start a monologue, saying that he saw that one of your crew members, Artois Voysey, just entered the town.
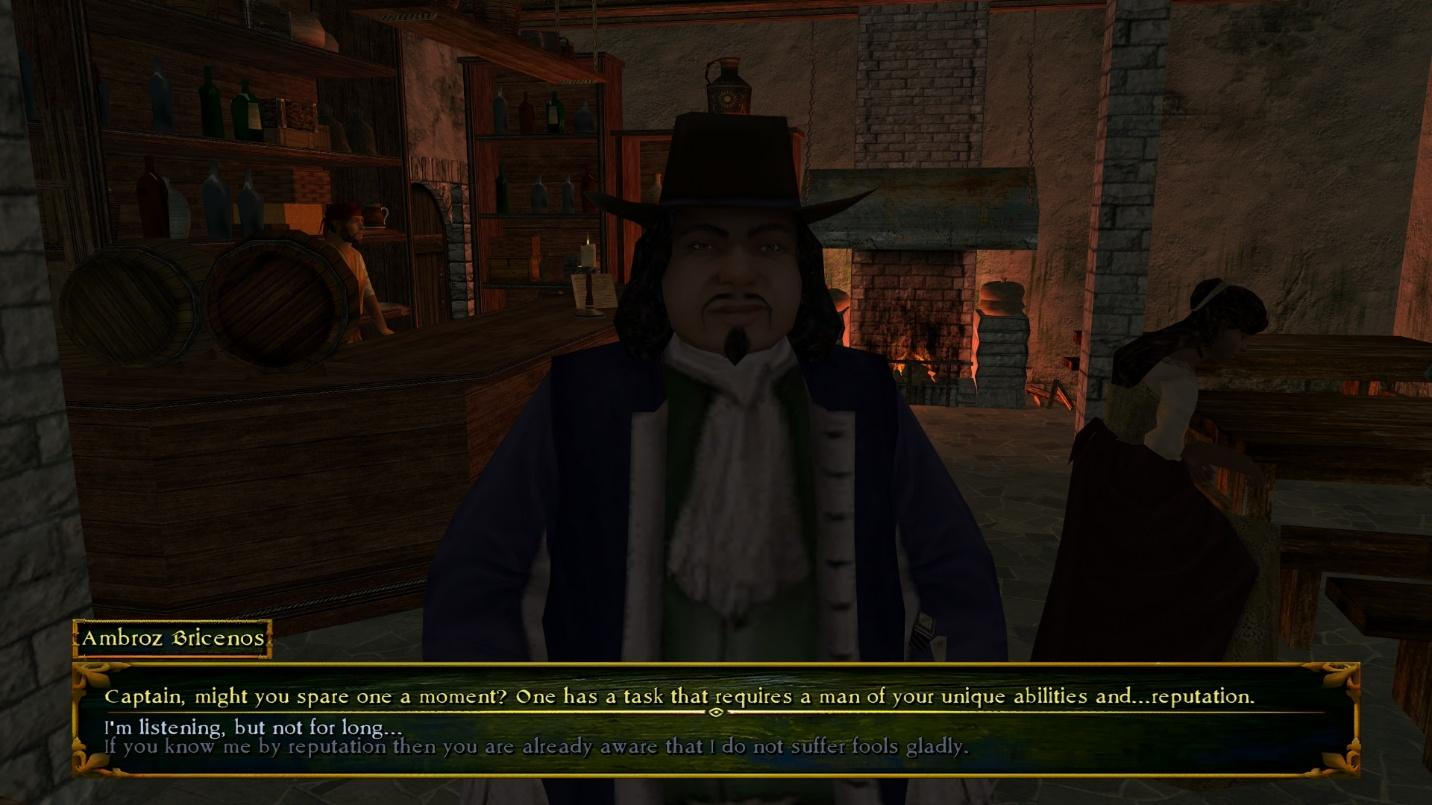
Go to tavern. Ambroz Bricenos automatically walks up and talks to you, makes you an offer. Accept or refuse.
ACCEPT - This is start of Hard Labors of an Assassin side quest - (You must by Level 5 or higher to be given this quest ) – Once you have accepted jobs from Mateus Santos there will be time limits on their completion.
Advice - If side quest started do that then come back and continue main quest.
REFUSE – Ambroz Bricenos Leaves – no quest book entry.
Now speak to tavernkeeper. Ask him about Raoul Rheims. (Note: you can also ask him about Artois Voysey), he will tell you that some thugs came inside and took Artois, while badly wounding his friend, who is recovering upstairs in the room. This is part of the side quest Artois Voysey side quest, you can either do this and leave the storyline for later, or proceed with the storyline and return afterwards for this side quest, since it’s not time limited).
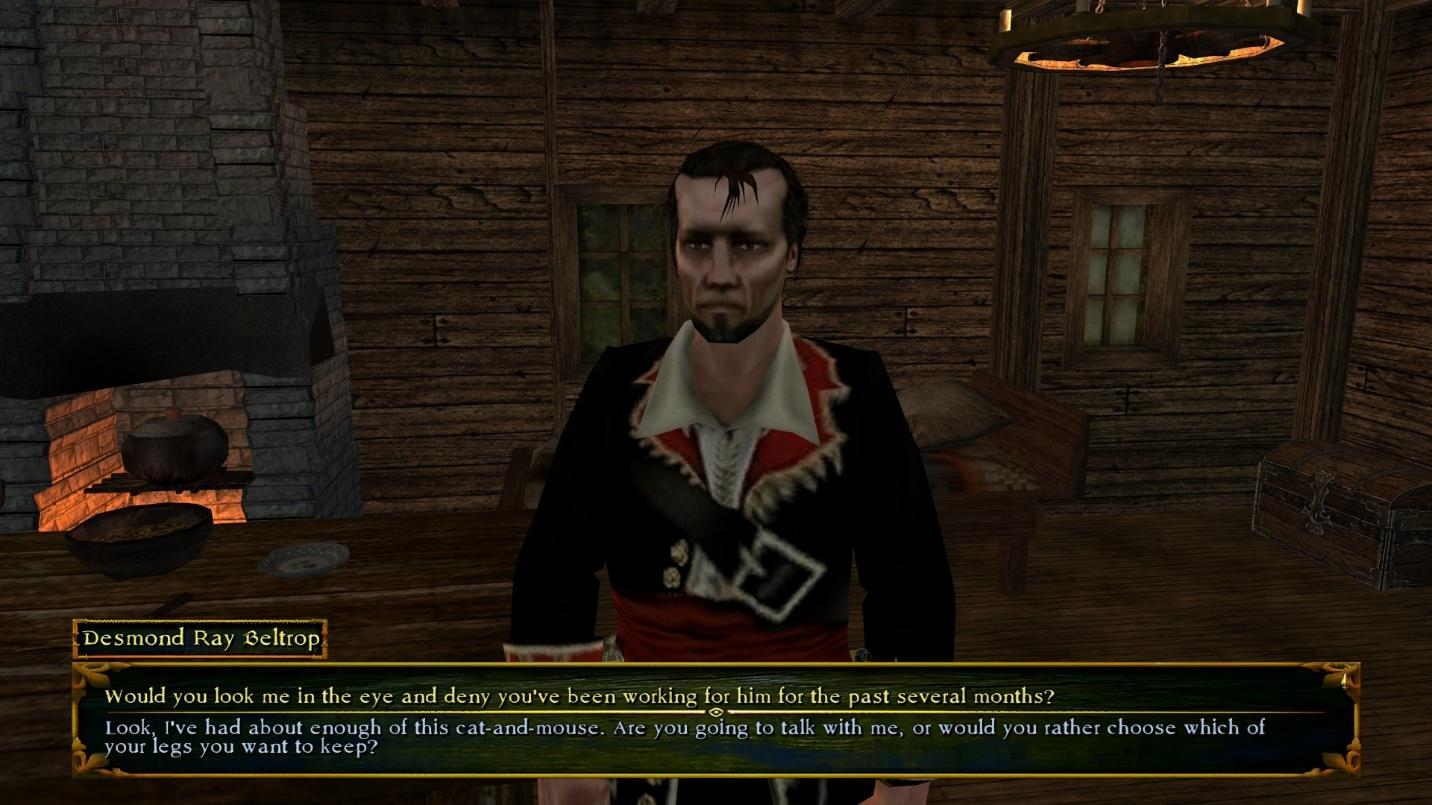
If you want to continue with the storyline, leave the tavern. Outside, a Smuggler will approach you asking are you the one looking for Beltrop. After threatening him, he finally takes you to Beltrop. Screen reloads and you find yourself in a house. Beltrop approaches you.
Exit Desmond Ray Beltrop’s house – Rheims’ house is the one with the 2 guards outside – go to tavern – rent a room till night - Quest book update. Exit tavern and go to the right side of Rheims house (near the palisade wall) – find way in, or kill the 2 guards outside front door and enter – inside Automatically walk and talk to self – Two pirates enter the room – they talk to you and attack you – Fight them (Tip: in Maelstrom edition they can be quite difficuly to defeat without potions, because of different combat system, so equip your self with at least 5 potion.)
After killing the pirates, leave the Smuggler’s lair and go back to Sao Jorge through the jungles to get to the ship. (Tip: if you are in aracade mode, just press ENTER and use the fast travel to save yourself from trouble.)
Sail to Speightstown (Barbados). Visit the shipyard and talk to Oweyn McDorey. Ask him about the chest he gave you to deliver to Port Royal. He tells you that he didn’t intend to get you in trouble, but to get rid of his old rival. He tells you that he got the chest from a man on Martinique, who lives near the port.
Sail to Martinique. On Land Ho – a cursed Pirate ship (if night time – crewed by skeletons) will be there - Ship is immortal and neutral to you, unless you hoist enemy flag near him. Do not attack! Continue to St Pierre.

From port, go to the town through the gate up the hill. In this part of town, find a person name Henry Peat. His hous is on the right side next to the second gate.
Enter the house. Henry Peat will be sitting on his bed. Talk to him. He tells you the tale of the Black Pearl, and how he served on that ship. Leave the house and go back to port. At port gate Gordon Carpenter will offer to buy you a drink. You get teleported to tavern where you are sitting with Gordon by the table. He tells you more info about the Black Pearl, and that there is an ancient Incan artefact that can lift the curse.
Quest book update in Deliver a Closed Chest – Quest Closed.
Now sail back to Jamaica. Go to the governor. Tell Silehard in townhall about not finding Rheims but having his journal. He tells you that he’s disappointed.
Part 10: Deliver a letter to a pirate chief
Sail to Pirate Settlement on Nevis. Go to the house of Pirate leader – talk to Isenbrandt Jurcksen – deliver the letter.
Sail back to Port Royale, Jamaica. Go to town hall – talk to Silehard – he gives you a reward and the next task.
Part 11: Return the native art collection
Sail to Kralendijk on Bonaire. Talk to tavernkeeper. Ask where the pirate fort is. Tavernkeeper will check you out, and then he walks away through the back door. A few moments later, a Pirate approaches you and speaks to you. He tells you he knows the way to the pirate fort. Screen reloads, and you are both teleported to the outskirts of Douwesen. He tells you that he can lead the way to the pirate fort, but that will cost you money. Or he can just show you the way and you can go by yourself. Choose what you prefer (I choose the first option, because it only costs 100 gold pieces). Follow him through the jungle, until you get to the palisade gate entrance. Dialog with the pirate. Pirate leaves. Enter the pirate leader’s house (picture below).
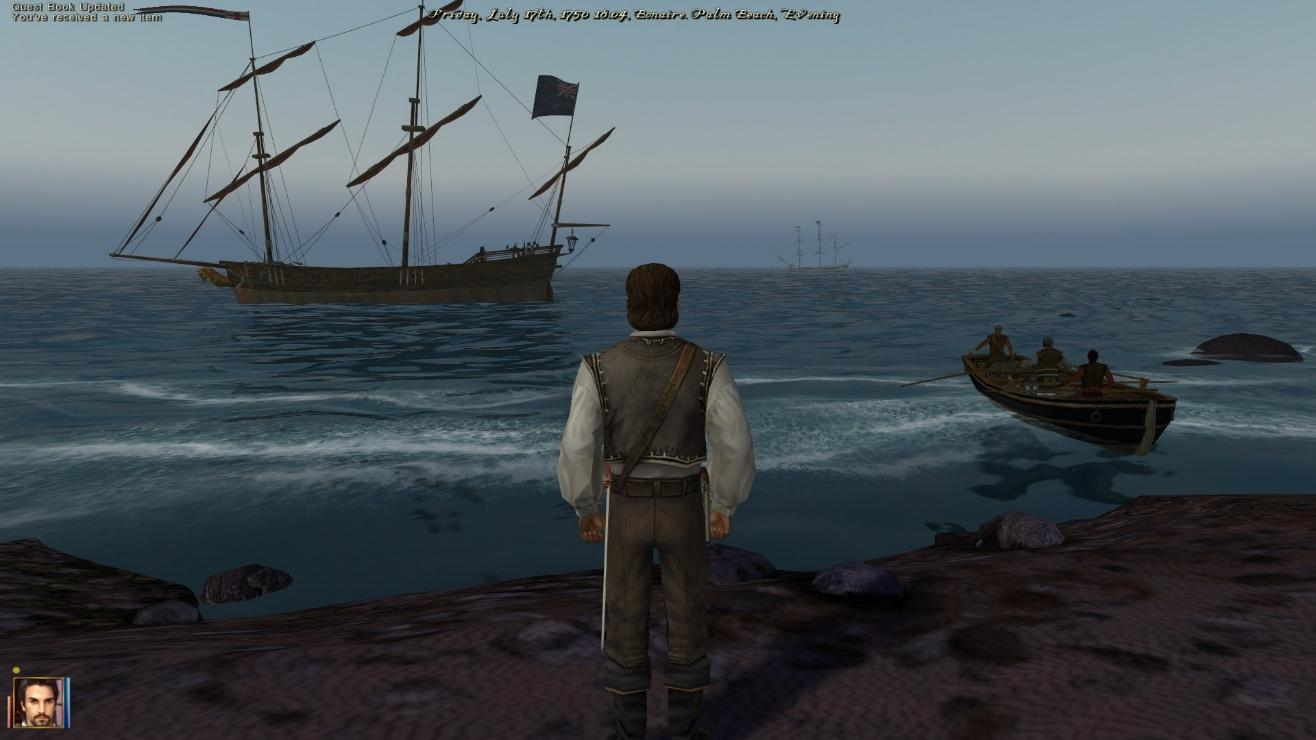
He will be sitting behind the table in his hut. Either buy the idols or threaten him. (If Leadership Skill is greater than 7 Alistair Garcilaso will give you idols – if 7 or less, threaten him or buy them from him ). If threaten – he tells you they are on his ship. Go to Palm Beach on the 1st left from the pirate fort. Crewman talks to you on beach.
Alternatively, you can threaten to kill Alistair Garcilaso. A cutscene stars where your hero hits him with the sword while he’s sitting. He falls dead. Quest book update. Go to the Palm Beach, one of your crewmen approaches. He tells you that a ship flying the Jolly Roger is spotted near the beach. You have to options: to try and sneak from land (triggers a boarding fight with pirates), or to attack it from the sea (you need to board the ship and steal the idols). Go for first option, if you choose to kill Alistair Garcilaso. Easiest way is to buy the idols from him.
Sail back to Port Royale, Jamaica. Go to townhall and talk to Silehard. Get reward and a new task.
Part 12: Deliver a prisoner to the governor
Sail to Bridgetown, Barbados – go to Prison – (2 soldiers are standing outside).
Talk to Ronald Blacklock, Prison Commander. He tells you that he can’t hand you the prisoner right now, because he escaped. – Quest Book update.
Exit Prison – A Woman walks up and talks to you and begs you to save the man from being burned alive. He is accused of sorcery. Choose any option in the dialog - all of them will enable you to rescue man about to be burnt.
EITHER Talk to men standing around him,
OR Talk to soldiers and get them to stop things,
OR if you refuse to help the Woman – then a man & the men standing around the Researcher will attack you. – Fight and kill them.
BEST CHOICE: Talk to any of men. Tell them that it’s no wonder that this colony is considered the most barbaric in the Archipelago. You will inform the governor about this barbarism. He asks if you know the governor. Then you ask him did they consult the church about this. He says that they didn’t but the church would surely approve. At the end, they give up and Clement is free without any fight.
Clement Aurentius talks to you – Agree to go and see his house. Transported to Lighthouse Bay - Clement talks to you – Danielle talks to you – Vincent talks to you. He tells you about Rheims’ whereabouts. – Danielle talks to you. You all agree to meet at the same place (Bridgetown lighthouse) after a few days, because Danielle needs to finish something first. – Danielle and Vincent leave.
Quest Book – Continue searching for Rheims opened. Go back through Canyon to Bridgetown (Beware of bandits, there’s a LOT of them). Alternatively, go to your ship with fast travel command, and then to sea. Sail to Port Royale, Jamaica – go to townhall – talk to Silehard. You tell him the bad news about your mission – the prisoner has escaped. Additionally, you share some good news with him too: you have found out about the whereabouts of Rheims. He tells you to immediately proceed with your quest of finding him.
Sail to Barbados again. Previously, Danielle told you that she had some unsettled business to finish, and that she will meet you in a couple of days at the Lighthouse bay. Those day will pass on your journey to Jamaica and back, so you don’t need to wait more than that.
Land on Lighthouse bay on Barbados. Run to the lighthouse, Danielle will come after you and start a dialog. She tells you to sail to Kralendijk (Bonaire) and that Vincent lives there. (Important Note: Make sure to have a place for her ship in your squadron, otherwise she won't come with you.)
On jetty in Kralendijk, Danielle approaches you and tells you that Vincent went ahead to the tavern. Go to tavern. Auto walk to Vincent. He tells you that Rheims is the guy sitting by the table next to the door.
Talk to Rheims. Teleported to the outskirts. A group of bandits follows you. Get rid of them and then go after Danielle and Rheims (follow the directions she gave you: straight, right, left, you will get to the Rheims house, picture included).

Enter the house. Auto walk to Danielle. Rheims is lying on the floor, badly injured. Speak with Danielle. She accuses you for working for Silehard. A cutscene plays: she draws a sword and hits you. You fall to the ground. Camera switches on Danielle, Rheims speaks to Danielle his final words. He tells Danielle about the Incan treasure and the Khirucatceliti idol. Danielle walks out of the house. Screen fades to black, and Nathaniel regains consciousness.
Part 13: Finding Danielle
Go to church – talk to priest Padre Domingues – ask for access to library. He will give you a quest to find important papers that were stolen from the church. In return, he will give you the access to the Library once you obtain them and bring them to him. – Quest book update.
Sail to Sao Jorge, Grenada.
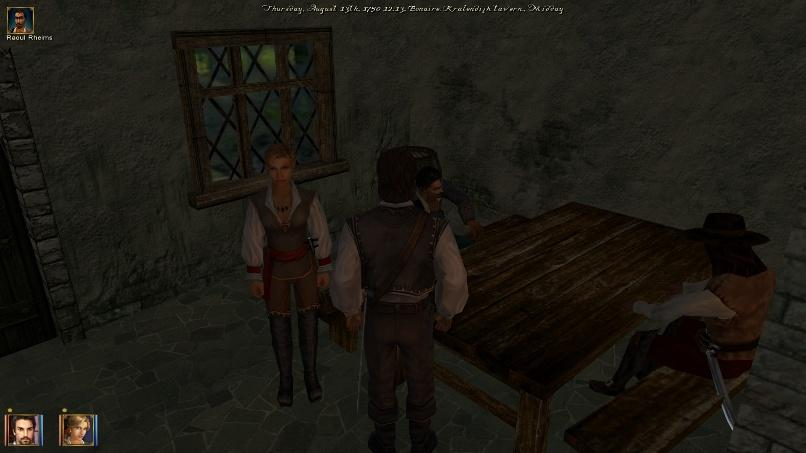
Go to tavern – talk to tavernkeeper – ask about Ferro Cerezo – talk to Ferro Cerezo. (The options you will get for this conversation depend very much on your reputation and level of commerce skill.)
OPTION 1: Tell him that you want to buy the papers from him. He will refuse, but then you can tell him that he must’ve heard who you are, the notorious Nathaniel Hawk. He then changes his tone and accepts to give you the papers. – Quest book update. Go back to San Juan and talk to Padre Domingues.
OPTION 2: Threaten him directly. Don’t say you want to buy the papers. Choose the first sentence when the dialog gives you options to choose:
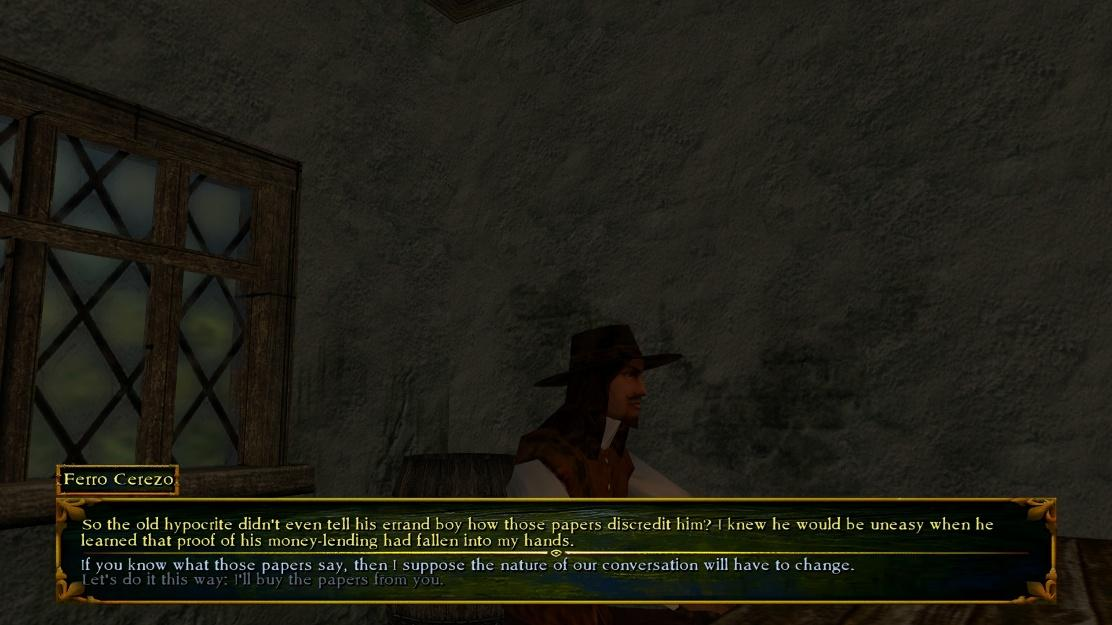
You tell him that he must’ve heard who you are, the notorious Nathaniel Hawk. He gives you the papers immediately. Go back to San Juan and talk to Padre Domingues.
Go to church – talk to priest Padre Domingues – give him the papers or Blackmail him (that will damage your reputation). He grants you access to the Library. Screen flickers quickly – Quest Book Update: you have found the book that you wanted, but someone has torn the pages already. You assume it was Danielle. She was quicker than you.
From this point, you have two options:
OPTION 1
Sail to Bridgetown, Barbados. Go to Town Gate to Canyon
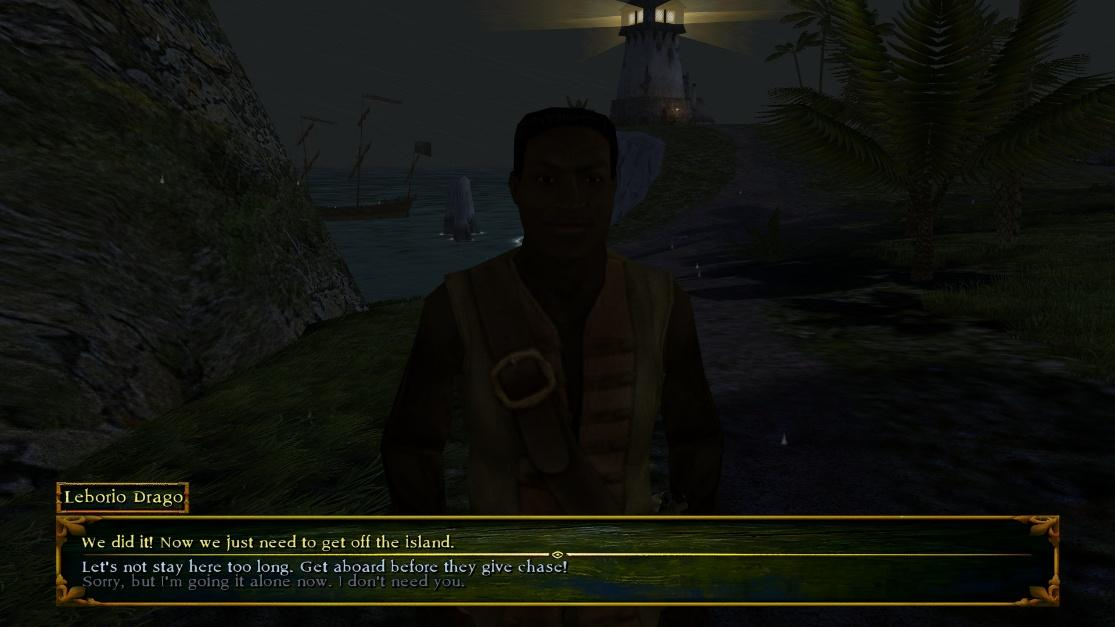
If you Melee skill is less than 8, outside of town gate, three men approach you, auto-walk and dialog starts. They knock you out. Loading screen: Transported to Mine. Leborio Drago talks to you. After that a soldier talks to you and leaves. – Leborio Drago talks to you again. He asks if you are really a captain and gives you an offer to escape with other slaves. You agree (no other options here). Screen fades to black, time passes. He returns with the smuggled weapons. Slave revort starts, and you have to fight your way out (Leborio Drago is invincible, so you cannot fail). After you go out, another fight starts outside of mine. Now you have to go to your ship through the canyon. Go to the right from palisade wall and follow the way. Make sure you avoid the bandits (or fight them, it’s your choice).
OPTION 2 (better choice)
Sail to Lighthouse Bay on Barbados and go to mine from there. Talk to Mine commandant (house on the left, once you enter the mine compound. Go into mine, talk to Leborio Drago. You have two options: to lead a slave revolt as in Option 1, or to threaten him to give you the info.
Go back to ship.
Sail to San Juan, Puerto Rico. Talk to tavernkeeper, ask about man studying local native languages, ask about Danielle – Quest Book Update. Exit tavern – Automatic reload screen to night – fight 3 men. Danielle recovers and walks up and talks to you (long dialog about Silehard). – Quest Book update.
Danielle runs of to Port – follow her.
Part 14: Get details from the governor
Sail to Jamaica. When you go to sea near Jamaica from world map (or through direct sail), you are automatically teleported to Devil’s Throat shore. Danielle approaches, she tells you to wait here until night, cause it will be safer to infiltrate into governor Silehard’s mansion. – Screen reloads one more time, and time changes to night. Danielle approaches one more time. Auto dialog. Teleported into Silehard’s room. Silehard asks you about this late night surprise. He offers to spare your lives if you both leave immediately. He then calls the guards after he realizes that you won’t leave him be without interrogation. He runs away and two gurads enter the room. Fight them and kill them. Run through the door (automatically teleported to Devil’s Throat). Danielle talks to you on the beach. She tells you to go to Barbados, and find a man named Giraldo Figuiera. She assumes he’s probably dead, because she gave him the idol. Your roads split, Danielle goes to look for the answers about the idol.
IMPORTANT!
This part of quest is very difficult if you go with the starting ship (Heavy Lugger). If you haven’t obtained a better ship until this point, I advise you to get at least a 4th tier ship, because you will have to fight a naval battle and board an English ship with soldiers that are stronger than your crew.
Sail to Bridgetown, Barbados. Inside town, you can either talk to soldiers guarding the town gate and ask about a man accused of murder who ran away, or you can go to tavern and the tavern keeper about the death of Giraldo Figuiera. – Quest book update
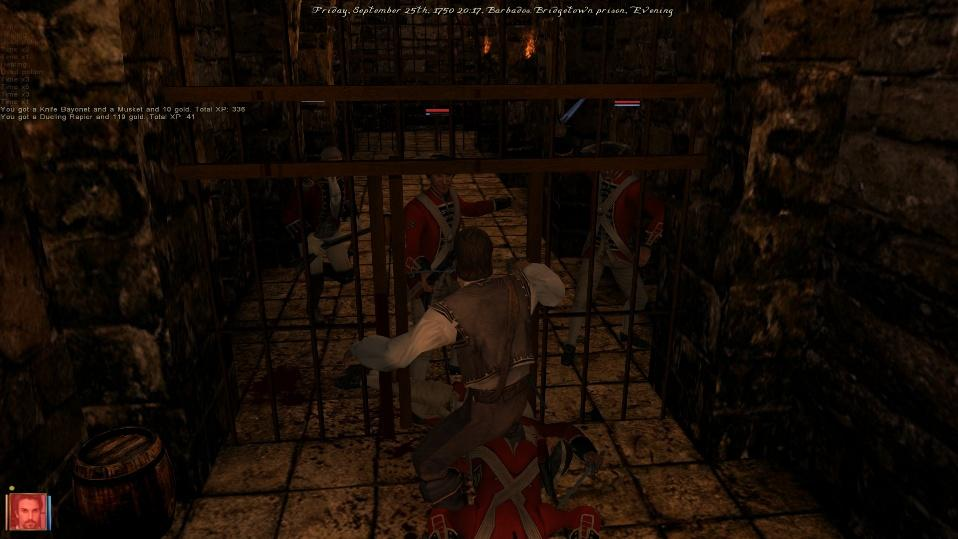
Go to Bridgetown prison. Talk to Prison Commander Ronald Blacklock. Ask about the idol. Your cover gets blown, cause the governor ordered him directly to make sure the idol gets to Port Royale. Fight occurs, you need to kill all the guards + Prison Commander. Make sure you are equiped with potions. Best way is to run away to one of the prison cell doors. From there, you can fight them 2 by 2. Check the picture below.
From this moment, you are an enemy in Bridgetown. When you get out of prison, run as fast as you can, go through the town gate to port, then run to the jetty. When you get to sea, fort will shoot at you, so try to run with the wind. Surrounding ships will chase you as well. Among those ships, there is a Lyme class frigate “Athena” (picture below). You need to board or sink it (boarding is a better choice if you have a strong ship with a lot of crew, and you get to keep this ship later during storyline). Once you do one of the mentioned, you will get the idol in your inventory. – Quest Book update
Now go to world map, and sail around for a day or two, then go back to Barbados. Your relation with the towns will reset, including the surrounding ships. Now sail to Lighthouse Bay on Barbados. Go to shore. Clement Barnabas Aurentius will run to you.
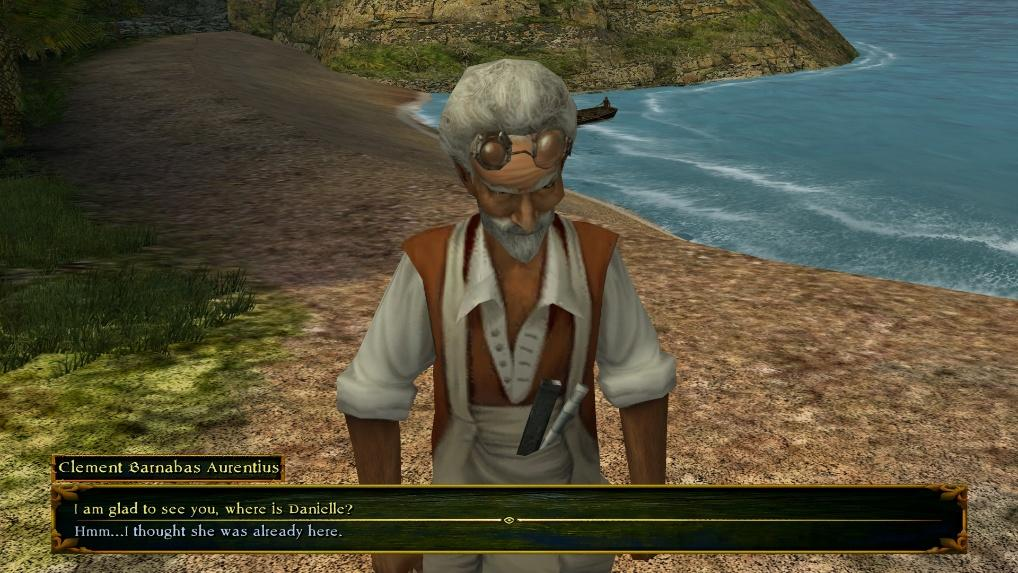
He tells you that she went to San Juan. – Quest Book update
Part 15: To San Juan
Go to world map. Start sailing to San Juan. Once you get away from Barbados, a storm cutscene will play, and you will find yourself on shore in Bonaire. A Citizen walks to you and speaks. He tells you that you are lucky to be alive. Go to Pirate port (first right, you will see a statue). Talk to pirates walking around. They will tell you that old Pinto is gathering crew for his ship. He can be found in the tavern.
Go to tavern. Find Anacieto Rui Sa Pinto. You have two options here:
OPTION 1 – Argue with Pinto and end up fighting in tavern or on his ship – take over his ship and sail to Puerto Rico. If you fight on ship and your Leadership is less than 6 – cannot take over ship – you jump overboard and get washed up at Barbados Lighthouse – Clement Aurentius talks to you and lets you take his small boat – Sail to Puerto Rico.
OPTION 2 – say “Fine I’ll try my luck somewhere else” – Quest book Update. Wilfred Bythesea walks up and talks to you – offers to give you a ship if you kill Sidonio Ogarrio in San Juan – Quest Book Update (Kill Sidonio Ogarrio opened, but there is no actual quest).
Go back to beach (left from the statue). Ship will be waiting there. Sail to San Juan, Puerto Rico - On Jetty (Kill Sidonio Ogarrio quest automatically closed). Surviving members of your crew automatically walk up and talk to you – Quest book updated
Transported to tavern – more talk with the crew members. Danielle enters the tavern during your conversation. She speaks to you in front of your crew. After that, she calls you upstairs to continue the conversation in private. She tells you her ship was stolen, together with tablet, but she made a copy of the scripture. – Auto walk to door. Teleported to jetty. Danielle approaches. You tell her that everything is ready to set sail. Another visit to Clement.
Sail to Barbados. Land on Lighthouse bay. Go inside the Lighthouse. Lieutentant Harris speaks to you. He tells you that Clement has been taken to a local jail. He intends to arrest you, but you resist and fight starts. Kill him and his two other officers. (In Lighthouse search for best Spyglass in game – go up stairs ¾ way and across plank to landing – then jump down 2 levels – on window ledge is Excellent Spyglass – then jump down to floor.) Go outside. Danielle runs to you. You speak about Clement and him being thrown into prison. She tells you that you should go together and free him. But not by sneaking, but by attacking the town from sea and ground. She will lead the ground attack, and you will fight the fort. Keep in mind, this is a difficult mission, and if you don’t have a strong ship, with full HP and crew, you won’t be able to take down the fort.
CHOICES in Danielle's dialog
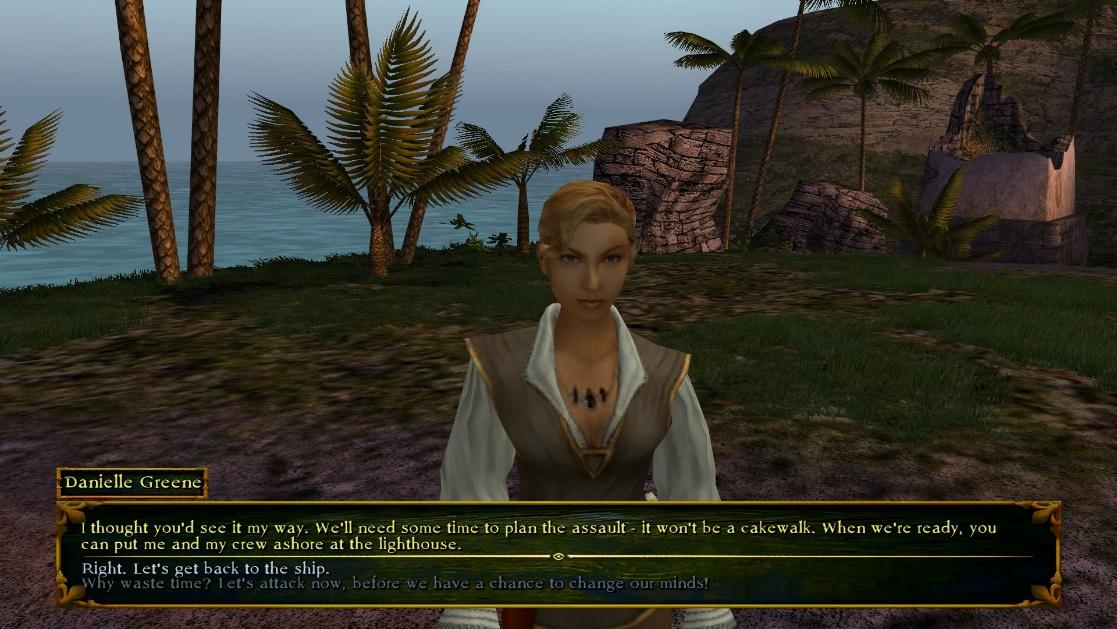
CHOICE 1: “Right. Let’s get back to the ship.”
Return to your ship – and go and get bigger ship if needed – then sail back to Lighthouse Bay, Barbados – Talk to Danielle – if NOT ready say so (go and do what you need – when ready go back to Lighthouse Bay and tell Danielle that you are ready to Attack now).
Suggestion: At this point, if you are not strong enough, you won’t be able to defeat the fort and sack the city. Better go for Choice 2, and do some free play (the quest will pause until you go back and talk to Danielle). Get at least a 4th class ship, with full crew, hull and sail hp, and install the best cannons possible. You won’t be fighting just against the fort, but also nearby ships that spawn around island randomly can interupt your battle.
CHOICE 2: “Why waste time. Let’s attack now…”
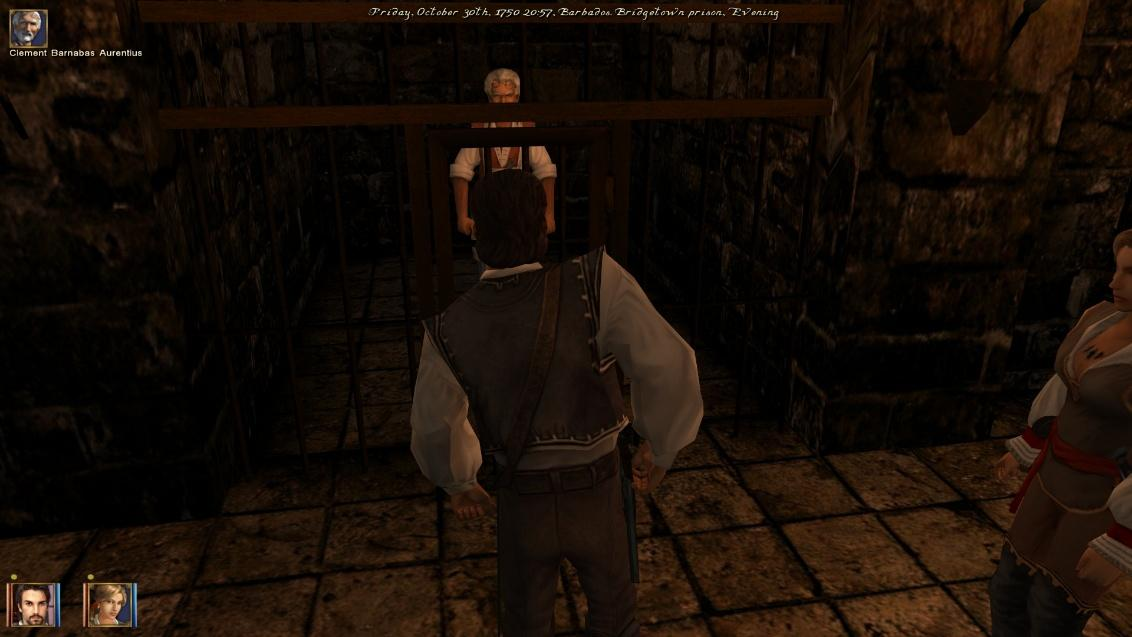
A cutscene happens. Reloads you to town, citizens are back on the streets. Danielle approaches. You both go now to free Clement. Follow Danielle (she will run into prison). Go and find Clement (he will be in the one of the cells to the very end of prison hallways). Speak to him.
Teleported to Lighthouse Bay. Dialog with Clement continues. He agrees to translate the ancient scripture, but in return asks to sail with you to the temple. After that, Danielle approaches, and tells you that you should prepare the defense of Bridgetown and use the time that Clement needs for translation to repair your ship and refresh your supplies.
Do the necessary things, then go to tavern and ask for a room to stay. Seven days will automatically pass. Exit the tavern room. Danielle approaches and speaks to you. She tells that it’s been a week already and that she’s getting bored. After that, one of your crew members enters the tavern with urgent news. He says that a large English fleet is sailing towards the island. Danielle tells you that she will control the fort, and you will attack the ships from sea.
Auto reload to sea. The battle begins.
This is also a very tough battle. I have used this frigate just as a reference. If you play this without cheats, this ship will be insufficient. Best arm yourself with a stronger ship with a lot of cannons. Or hire another captain and supply him with a good ship, that way you will have better chances to win the battle.
Best way to do this is to arm your ship with grain shots and kill that battleship’s crew, then board it and capture it. From that moment, you will take the other two easily. It’s easy to say and hard to achieve, because you will be fighting real soldiers in boarding action (check screenshot).
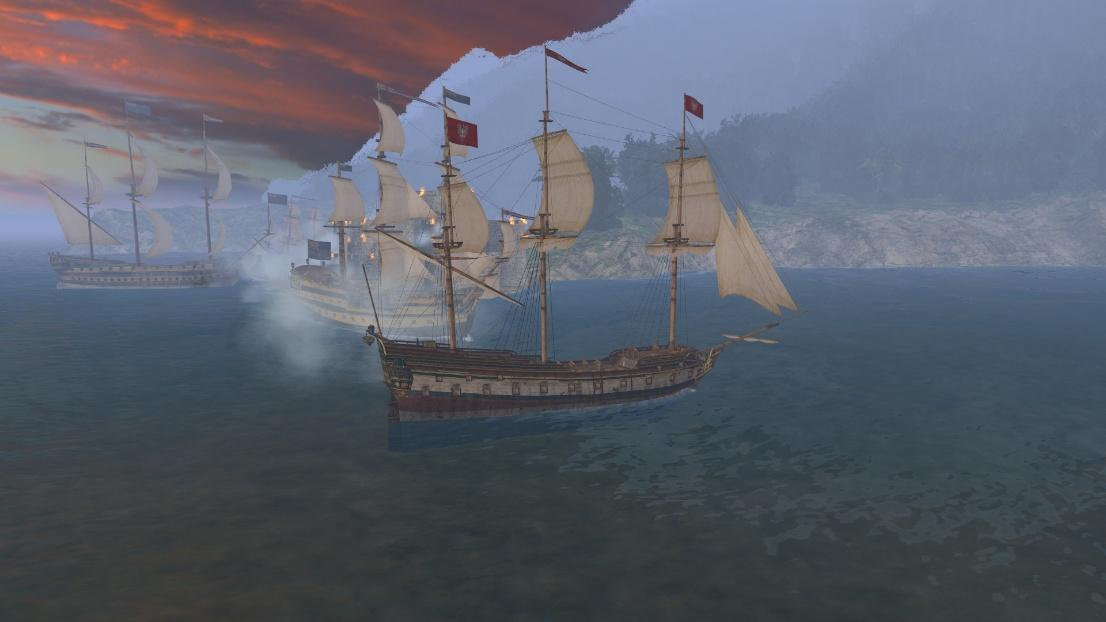
After you have successfully destroyed (or captured) all three ships from English punitive squadron (Vengeance, Desperate, Black Prince), you will be auto teleported to Bridgetown jetty. Danielle approaches you and speaks how glorious the battle was. – Auto teleported to Lighthouse Bay. Dialog with Clement. He says he needs another week to finish the translation of the scriptures. You tell him that there is no more time, and that Silehard will send more ships to capture the colony. He agrees to finish the translation during voyage to Cozumel. – Quest book update.
Part 16: Sail to Cozumel with Danielle and Aurentius
Set sail to Cozumel. When you go to sea, you will encounter 4 ships near the island, all waving pirate flags except Silehard’s battleship. It’s the Silehard’s fleet. You need to either sink them or board them.
If you board Silehard’s ship, a dialog will in his cabin play once you kill his crew on the main deck. If you sink it, quest book will auto update.
You will also find around 450k gold in his weaponslocker. After you have sinked all ships, the SailTo icon for Cozumel shore will open. Go there. Land on beach. Danielle approaches and speaks to you. After that Clement speaks to you. He hands you the translated scriptures. Night switches to daylight. And you are ready to go deep into the jungles where the temple lies.
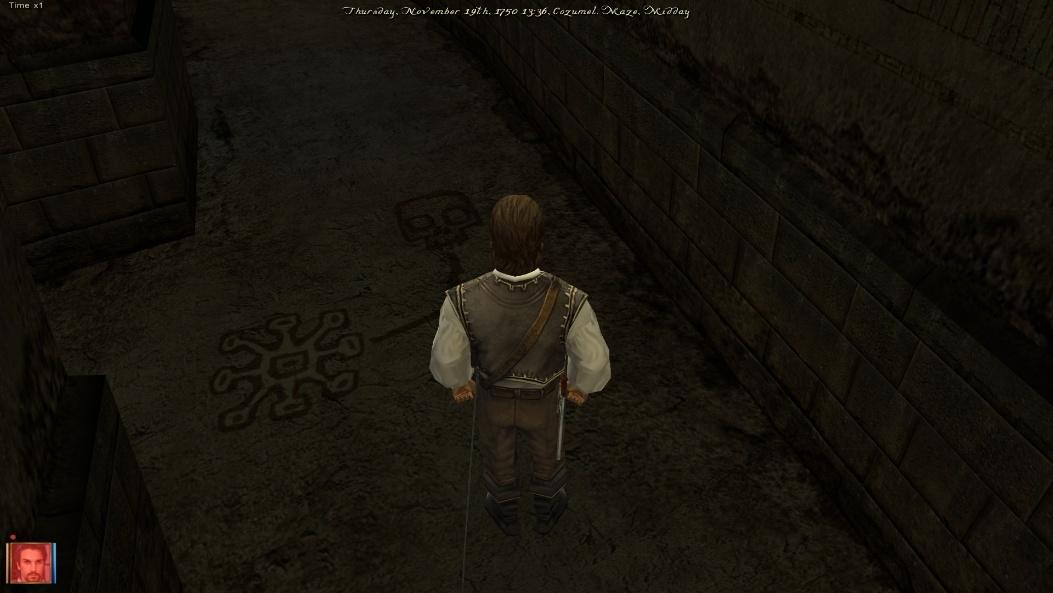
Go into jungle. Scene will reload to a temple valley. Go inside the temple (save before entering, cause you can’t go back once you enter).
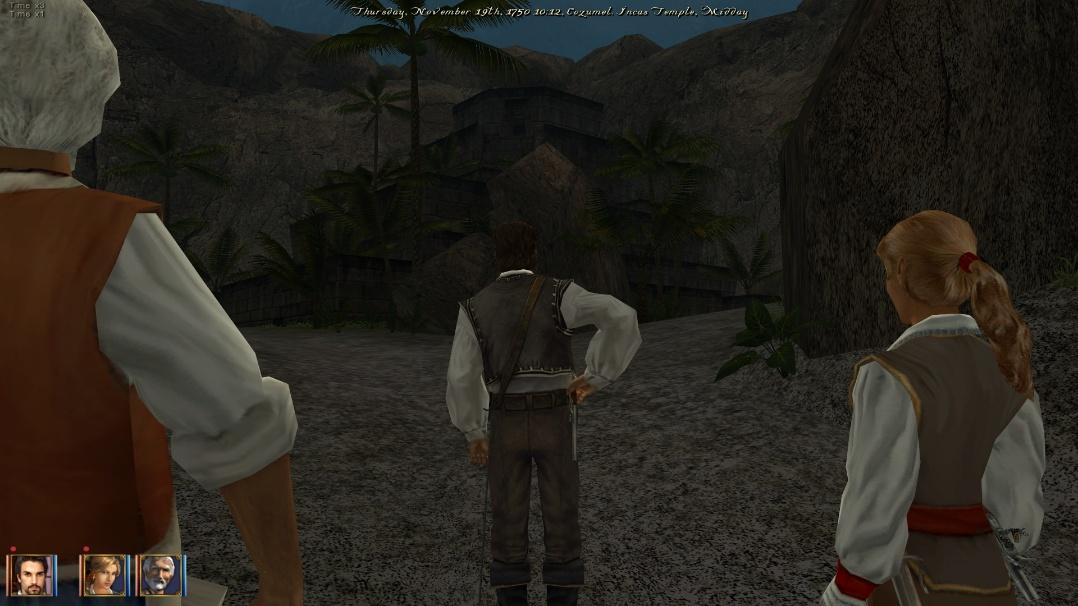
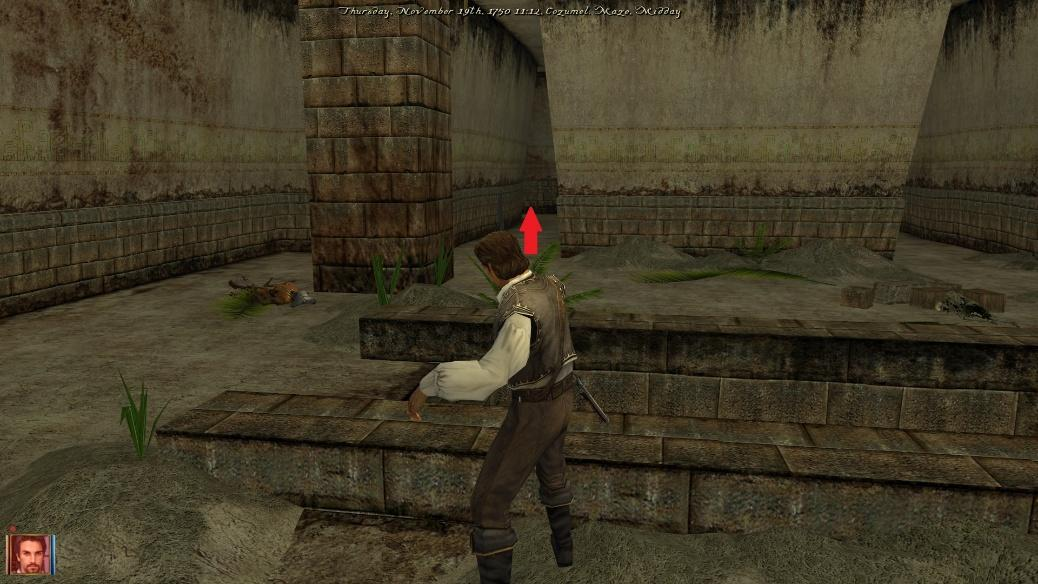
Before the entrance to the labyrinths, Danielle and Clement auto talk to you. Danielle suggests that you shoul split up, and everyone enters one labyrinth. You will go for the middle one. From this moment, you are on your own. Go straight to the end of the tunel, and you will see a small exit stairway. Take first passage on your right.
To find the developers room (Akella team)
Follow the path, take the first left (you will see a broken wall.

Walk through the wall on the right side from the entrance to the broken wall room (the wall is not solid).

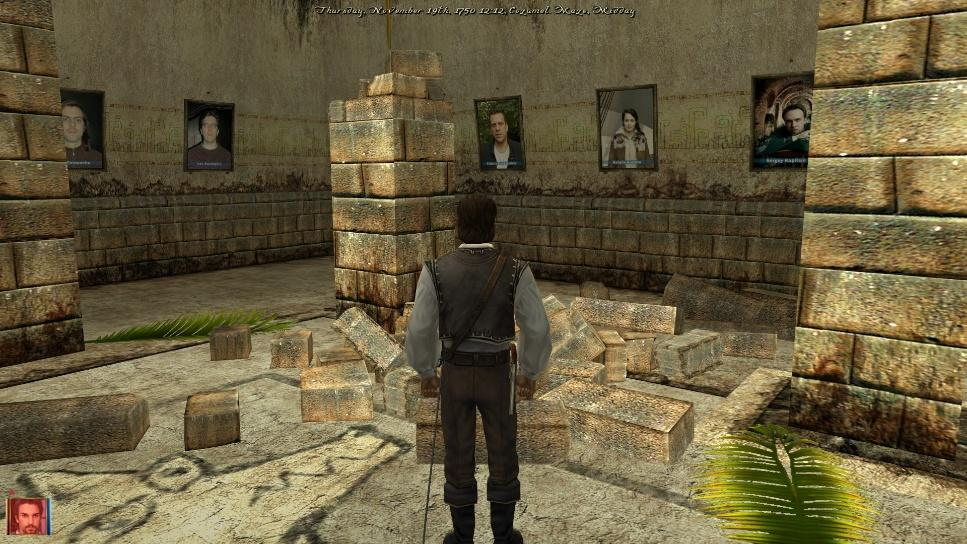
There are no items in this room. Just the portraits of the great people who made a great game.
Go back to the main corridor. Follow the markings on the ground. (Basically you just go straight from here to the upper corridor.)
Eventually you come to a room with a square in the centre of floor – Stand on the square and you will be able to place the idol in it.

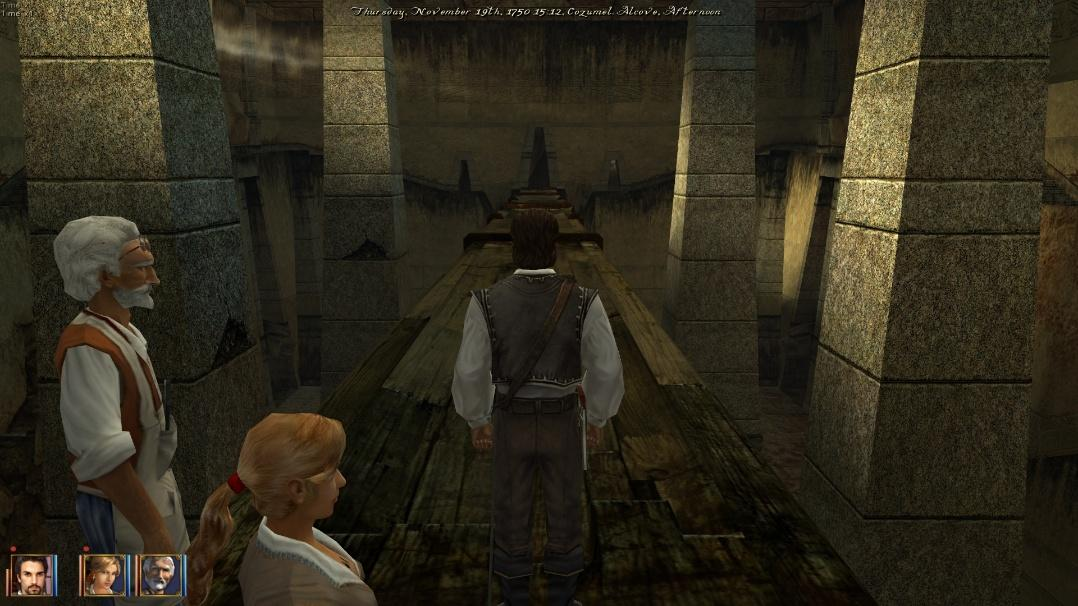
MOVIE CUT SCENE – Go into the opposite passageway from the one you entered the room by. Transported to Alcove. – Clement and Danielle walk up to you – Go to the other end of the Alcove. Two rooms will be ahead of you: the right one with green light, and the left one with red light. Go into the room with green light. Walk into the light (if you pick the room with wrong light you will be attacked by natives).
Teleported to the pathway on the upper floor. Go along the pathway and down the stairs to next transporter room on your right – walk into the red light – transported to next room. Go up the pathway until you get to the wooden bridge in the middle of the hall.
Walk over it and continue up the pathway. You will enter another room with red light. Stand on it. Teleported into the room with a large idol with wings.
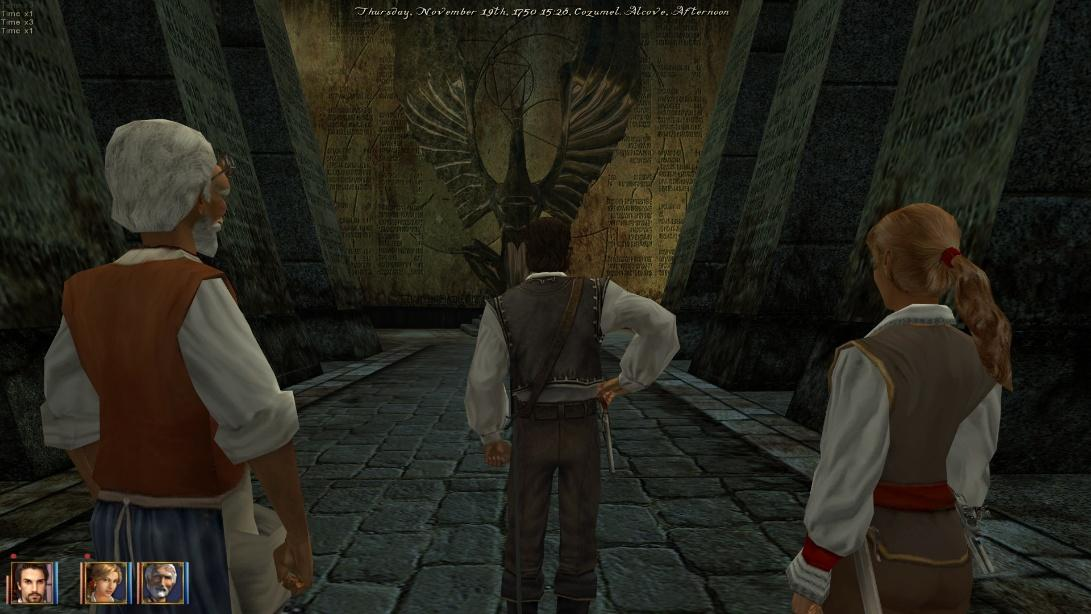
Danielle walks to you and starts a dialog. After that, Clement talks to you. Danielle runs to idol – follow her – MOVIE CUT SCENE.
Transported to shore – Clement talks to you – Quest Book update.
MOVIE CUT SCENE of Black Pearl – Transported to your ship in a stormy night – Fight Black Pearl (it is invincible, so use special ability from temple to make it vulnerable).
Part 17: After final
After fight with Black Pearl and final movie cut scene sail to Barbardos. Go to the Lighthouse Bay. Clement auto dialog. He says goodbye and leaves. Danielle talks to you after that. She suggests to go to Port Royal and see if there is any reward for defeating governor Silehard.
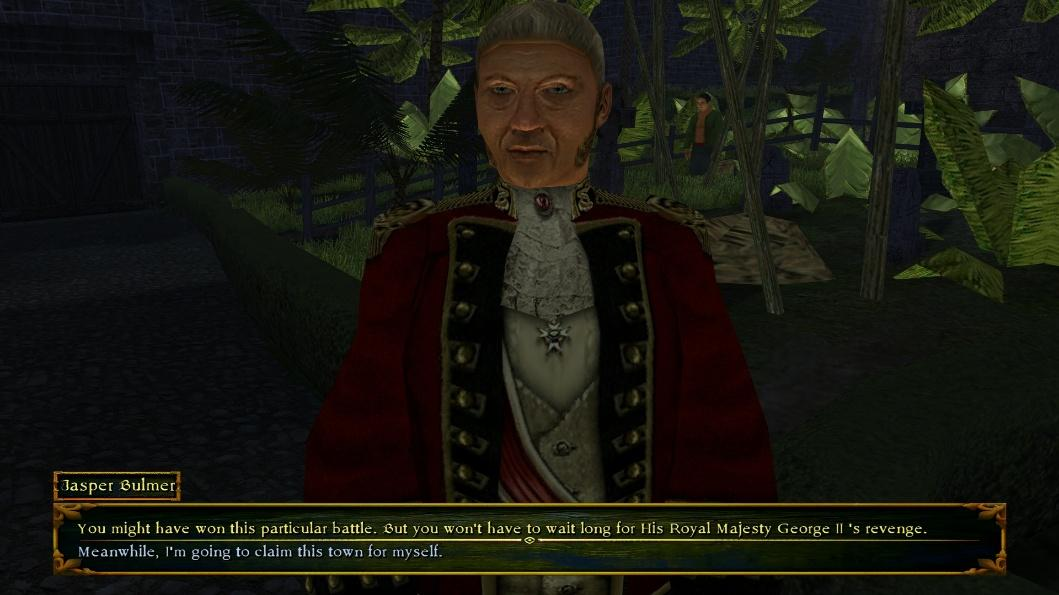
Sail to Port Royal. On jetty Danielle talks to you. Go to Town Hall. Talk to the new governor Sir Henry Moore. He rewards you 200.000 gold coins for the favor that you did to the crown in exposing Silehard’s corruptive actions.
He also tells you that from now he will be serving the Crown in Port Royal and will be giving you tasks from now on. You can either accept the offer or refuse generously. If you choose option 1 (to continue working for the Crown, he will give you the Letter of Marque, and your relation to England will again be good).
Leave the town hall. Danielle approaches you and asks how the conversation went. She asks you about reward, and then she asks you about the nature of your partnership. You can either choose to be only partners in business, or to choose the option “Sweet partnership, I think”, choosing to be her lover. – Quest Book update (main storyline finished).
From this moment, you can continue doing side quests and enjoying the Free Play. Have fun!